

Over the past 10 years I have met the most amazing people and I love seeing the things they create from my patterns, especially when they make them for their kids.
Tammi and Jonathan Pereira are a mom and son I have met through my shop and I consider them personal friends. I first met him when he celebrated his 11th birthday with a “snappy tots” cake. His mom has made him probably every hat I have designed.

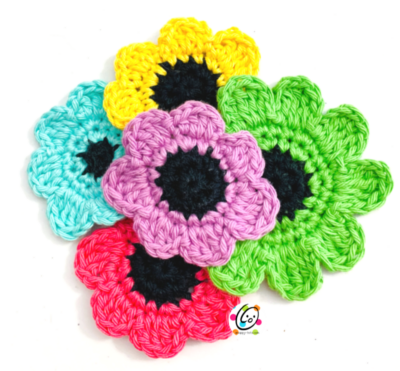
Jonathan is the inspiration behind these crocheted flowers. Keep reading to find out why and to get the free pattern.
Over the years it has been fun to see which hat he wears on his birthday.
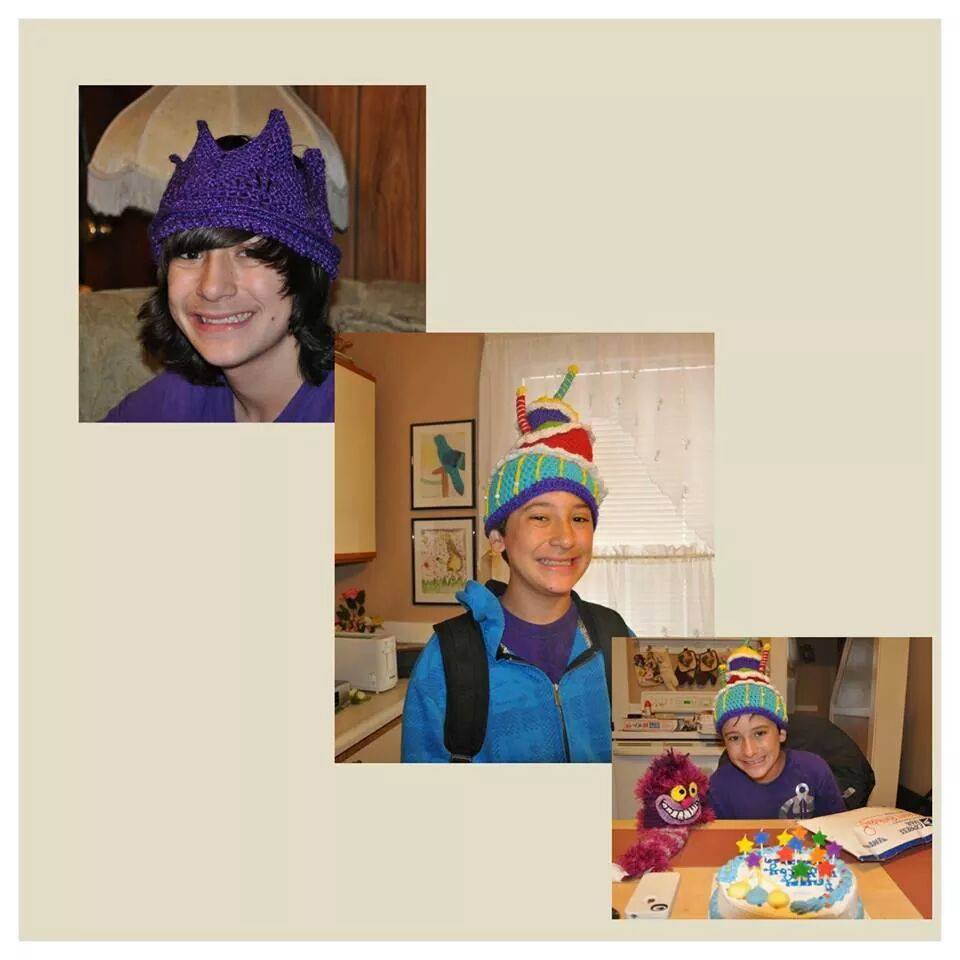
My “Mr. Chesh” even went to visit them when he traveled the U.S.


I loved seeing him wearing my hats so much that I designed the “Jonathan’s Gumball Hat” especially for him.
Now An Artist
Earlier this year, Tammi sent me a cute sticker with bright flowers and a couple of t shirts with a bright flower on the front. Jonathan has a shop and sells his awesome creations. He even has embroidered flowers.


One of the many fabulous things available in Jonathan’s shop is this shirt. His prices are AMAZINGLY low! You can purchase this shirt AT THIS LINK. More colors available and lots of sizes.His stickers sell quickly. He has added a holographic version too.
Crocheted Version
Tammi asked me if I could design a crocheted washcloth version of his flower cluster sticker. I hope I did it justice!
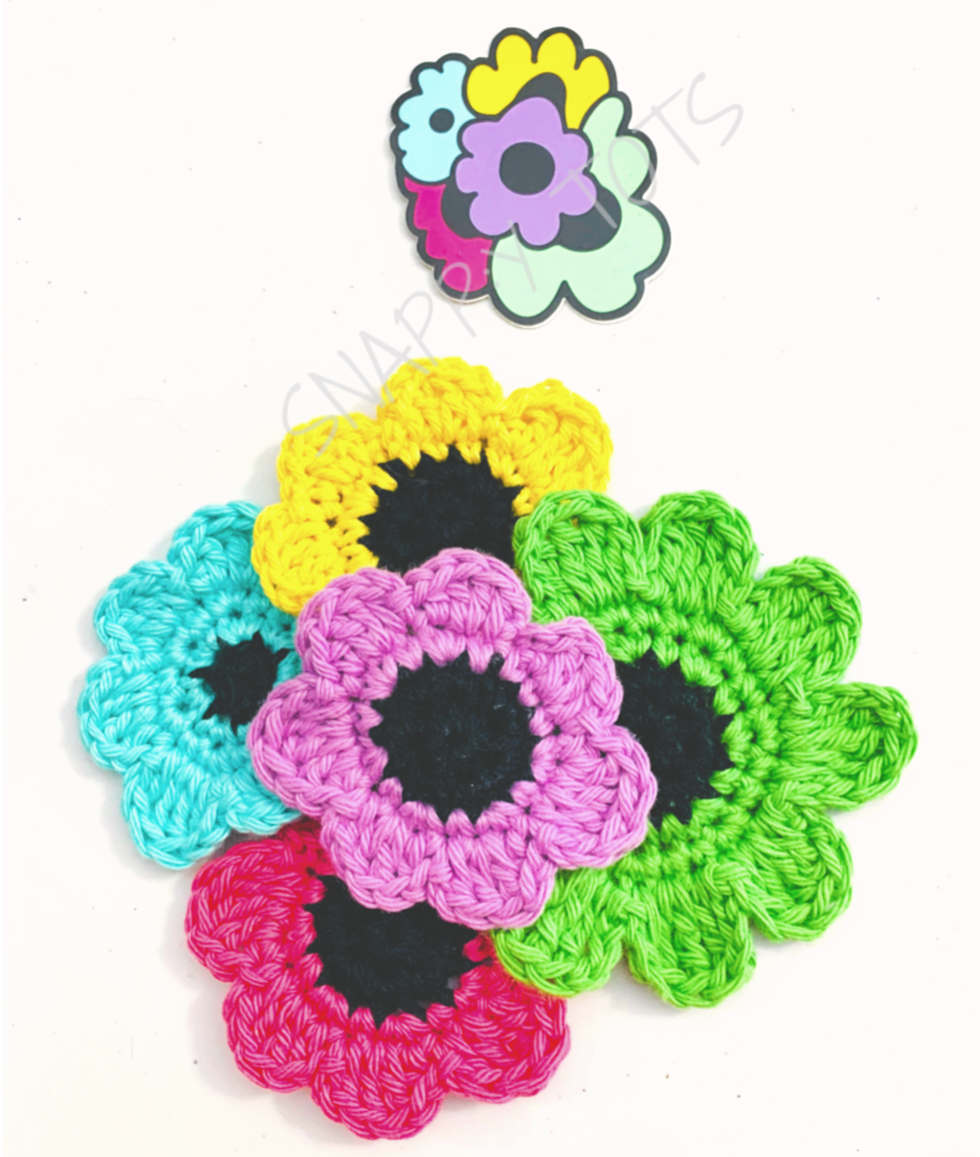
It turned out super snappy and too cute for just washing things so I have designed a bag to put them on. There are 2 different sizes of flowers. The bigger flower is a great size for a coaster and the smaller ones are perfect for little kid scrubbies or sewn on a headband or hat…. hmm… I think we need a special beanie for one of the flowers to match his shirts!
Please check out Jonathan’s shop for stickers, t-shirts and more at JONATHANUS and follow him on Instagram: @jonathanusss

Other patterns in this series you might enjoy
Jonathan’s Flowers Pattern
The patterns for all of these flowers are available for free below. A downloadable pdf for these flowers is available to purchase as part of my “JP Flower Bag”. CLICK HERE to purchase the pattern.
Materials and Details
- Yarn: Lily Sugar N Cream – 100 yards ww cotton per flower. Choose one color for the center and one for the petals.
- Crochet Hook: H (5mm)
- Notions: Yarn needle for weaving in ends
- Measurements: 3″ and 4″
Tips
- Numbers at the beginning of each line may refer to steps and not indicate number of rows.
- If you have any questions about this pattern please contact [email protected].
Directions
Flowers A and B are almost the same. The only difference is when the center color changes to the color for the petals.
Flower A
Make 3. Lavender, yellow, pink flowers in sample.
1. With an H hook and black yarn (or desired color for flower center), start with a magic circle of 7 sc sts (or preferred method for starting a circle of 7 sc sts), pull closed and sl st to join. (7sts)
2. Ch 1, 2sc in each st to end of round, sl st to join. (14sts)
3. Change color. Ch 1, sc in the same st, 2sc in the next st, *sc in the next st, 2sc in next st*, repeat to end of round, sl st to join. (21sts)
4. This step creates the petals. There are 7 petals on this round. *Ch 1, hdc in the same st, 2dc in the next st, hdc in the next st, ch 1, sl st in next st*, repeat once. Two petals complete (photo A).
Ch 1, dc in the same st, 2tr in the next st, (dc, hdc) in the next st, sl st in the next st. Three petals complete (photo B).
Ch 1, hdc in the same st, 2dc in the next st, hdc in the next st, ch 1, sl st in next st. Four petals complete (photo C).
Ch 1, hdc in the same st, 2dc in the next st, hdc in the next st, ch 1, sl st in the next st. Five petals complete (photo D).
Ch 1, dc in the same st, 2tr in the next st, (dc, hdc) in the next st, sl st in the next st. Six petals complete (photo E). Ch 1, hdc in the same st, 2dc in the next st, hdc in the next st, ch 1, sl st in the next st, next to beginning chain (see photo F). Seven petals complete (photo G). Finish off and weave in ends.

Flower B
Make 1. Turquoise flower in sample.
See photos from Flower A for step 4.
1. With an H hook and black yarn (or desired color for flower center), start with a magic circle of 7 sc sts (or preferred method for starting a circle of 7 sc sts), pull closed and sl st to join. (7sts)
2. Change color. Ch 1, 2sc in each st to end of round, sl st to join. (14sts)
3. Ch 1, sc in the same st, 2sc in the next st, *sc in the next st, 2sc in next st*, repeat to end of round, sl st to join. (21sts)
4. This step creates the petals. There are 7 petals on this round. *Ch 1, hdc in the same st, 2dc in the next st, hdc in the next st, ch 1, sl st in next st*, repeat once. Two petals complete (photo A).
Ch 1, dc in the same st, 2tr in the next st, (dc, hdc) in the next st, sl st in the next st. Three petals complete (photo B).
Ch 1, hdc in the same st, 2dc in the next st, hdc in the next st, ch 1, sl st in next st. Four petals complete (photo C).
Ch 1, hdc in the same st, 2dc in the next st, hdc in the next st, ch 1, sl st in the next st. Five petals complete (photo D).
Ch 1, dc in the same st, 2tr in the next st, (dc, hdc) in the next st, sl st in the next st. Six petals complete (photo E).
Ch 1, hdc in the same st, 2dc in the next st, hdc in the next st, ch 1, sl st in the next st, next to beginning chain (see photo F). Seven petals complete (photo G). Finish off and weave in ends.
Flower C
Make 1. Lime Green flower in main sample.
1. With an H hook and black yarn (or desired color for flower center), start with a magic circle of 7 sc sts (or preferred method for starting a circle of 7 sc sts), pull closed and sl st to join. (7sts)
2. Ch 1, 2sc in each st to end of round, sl st to join. (14sts)
3. Change color. Ch 1, sc in the same st, 2sc in the next st, *sc in the next st, 2sc in next st*, repeat to end of round, sl st to join. (21sts)
4. Ch 1, sc in the same st, *2sc in next st, sc 3*, repeat to end of round, sl st to join. (26sts)
5. This step creates the petals. *Ch 1, dc in the same st, 2tr in the next st, (tr, ch 3, sl st) in the next st, sl st in the next st*, repeat until 2 sts remain. Ch 1, dc in the same st, 2tr in the next st, (tr, ch 3, sl st) in the st next to the beginning chain. Finish off and weave in ends.

Cluster Assembly: Overlap flowers as shown in main photo. With a yarn needle and black yarn, sew through the top flower center and through the layers below it. Use other yarn colors to sew through some of the petals to sew the flowers together.
Pin To Save For Later

Leave a comment