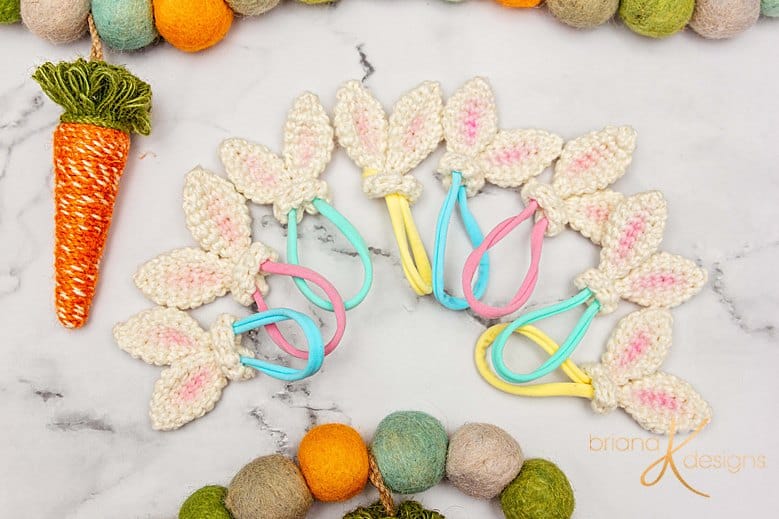
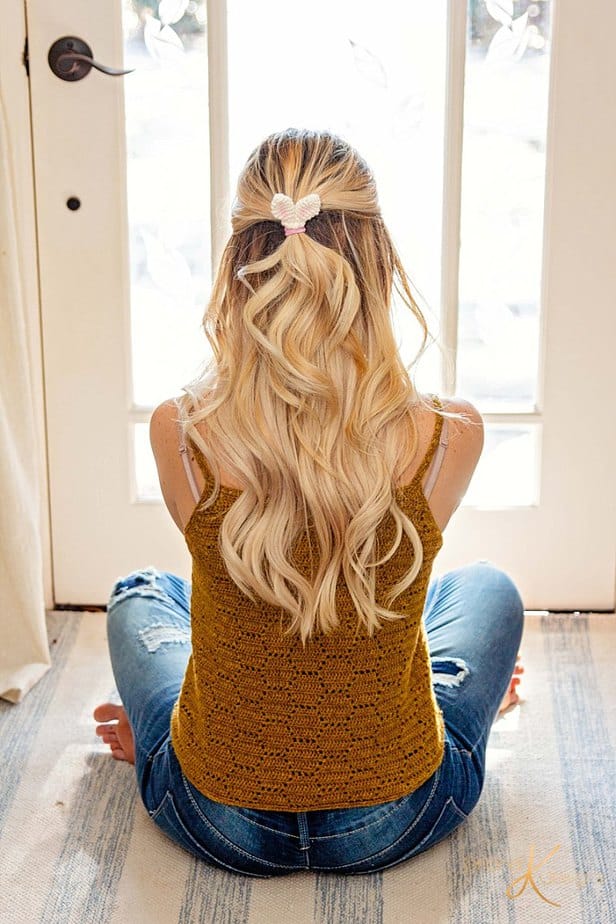
Bunny Ears Hair Tie Adorable Free Crochet Pattern
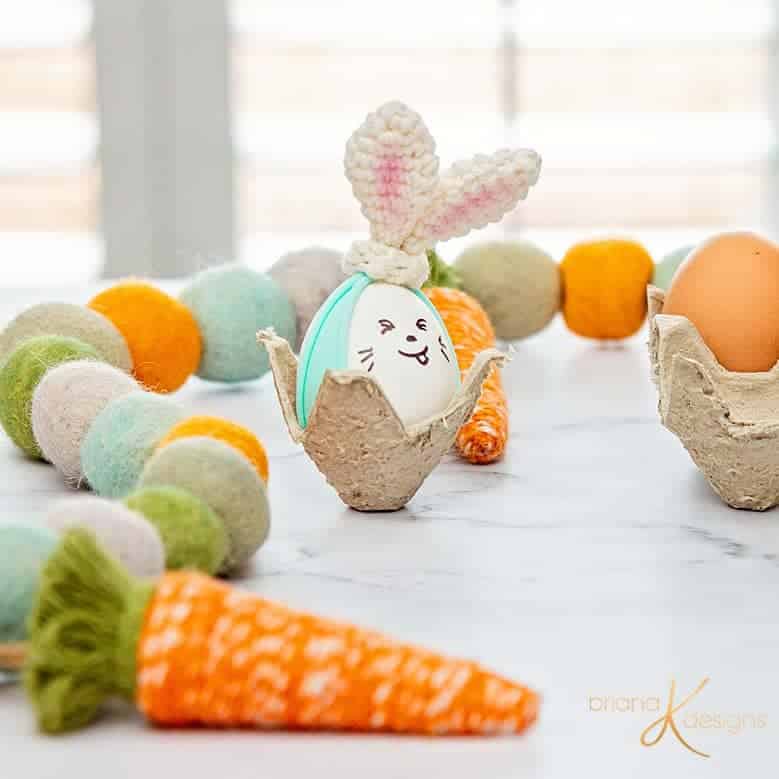
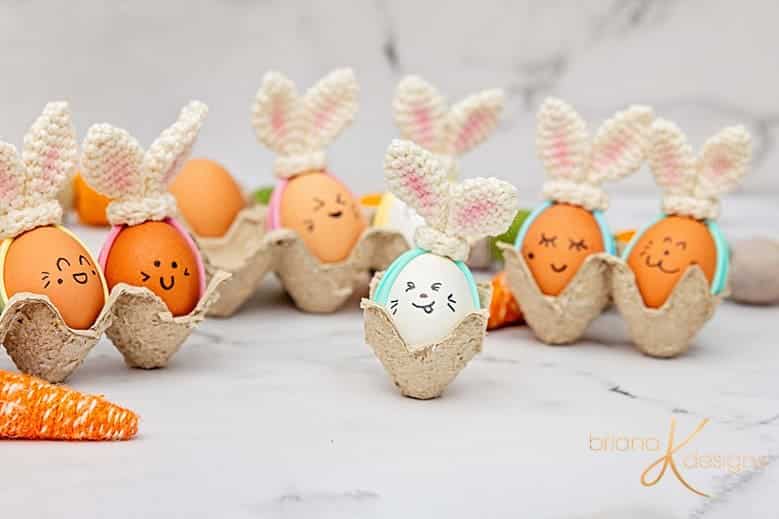
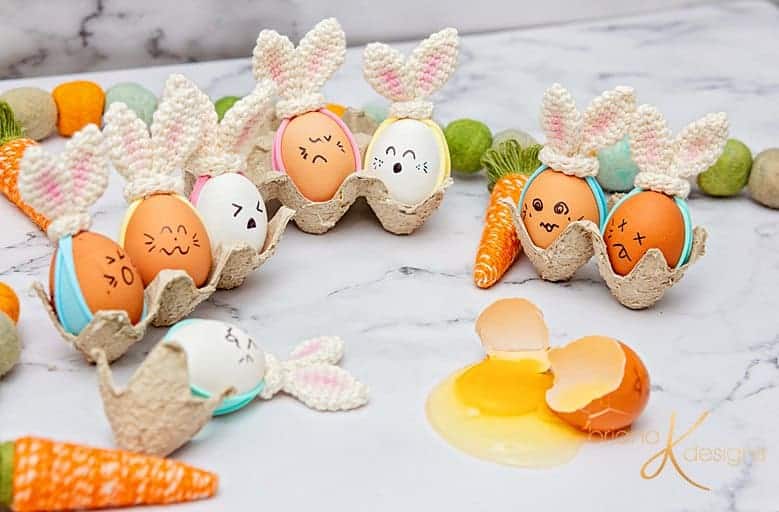
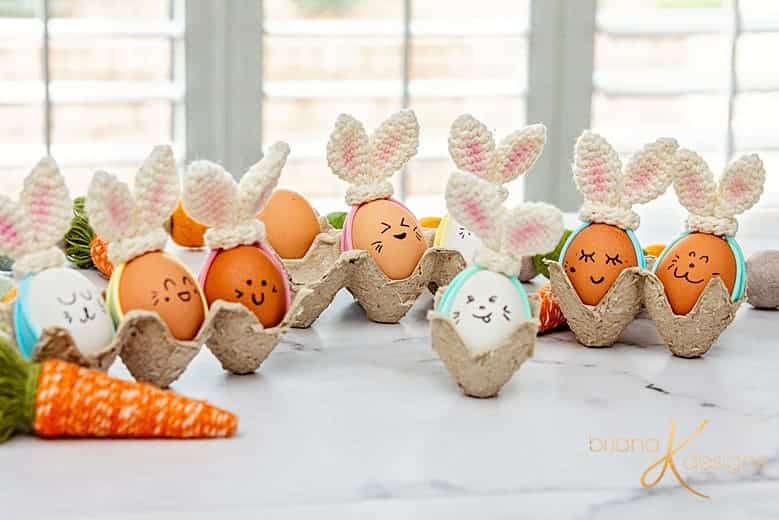
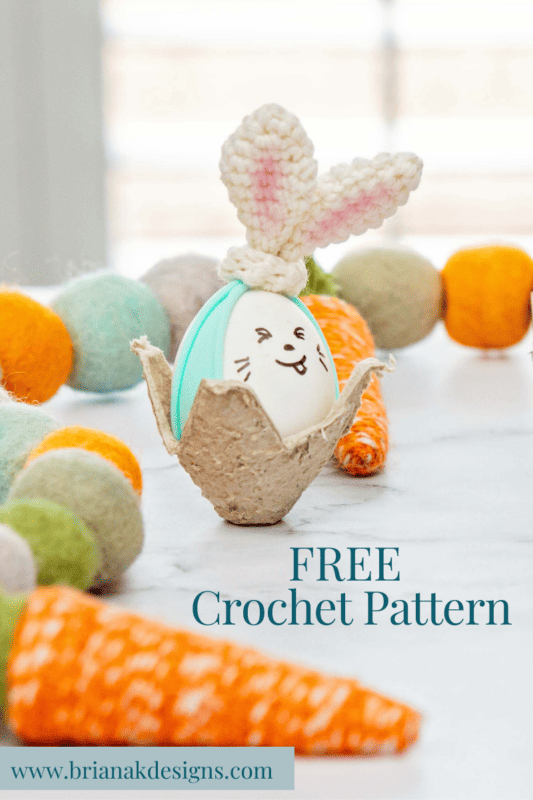
Aren’t these the cutest Crochet Bunny Hair Ties? The bunny ears are a fun little accessory to add a little hop in your day. And they fit perfectly around an egg so they can be used for Easter decor as well! This free crochet pattern is simple and easy to follow, so it's perfect for any level of crocheter. The bunny ears can be made in any color of yarn you have, making them a great way to use up all those scraps! So get your hook ready and let’s make some easter bunny hair ties!
I can just see some happy girls out there opening up an Easter egg to find this inside. And if you love a cute bunny, also check out the Be My Bunny Crochet Pattern or the Bunny Easter Basket Crochet Pattern.
Disclosure: This post contains affiliate links, meaning I get a commission if you decide to make a purchase through my links, at no cost to you.
Why You Should Create a Crochet Bunny Hair Tie for Easter
- They are fun and festive for easter decor.
- The easter bunny ears look cute in any color of yarn.
- It’s a great way to use up scraps of yarn.
- A simple crochet pattern that is easy enough for any level of crocheter!
- Perfect for an easter basket.

Do You Love Crocheting Easter Holiday Decor?
If you love crocheting easter decorations, then these Crochet Bunny Hair Ties are the perfect project for you! And if you would like more crochet pattern inspiration for the Easter Holiday, check out the Unicorn Crochet Easter Basket Pattern or the Newborn Bunny Crochet Pattern. And don't forget about the Fluffy Bunny Crochet Pillow, which creates cute Easter home decor.
They are a fun way to add some easter flair to your holiday decor, and they make great gifts too. Whether you give them as easter presents or keep them for yourself, these bunny ears are sure to bring a smile to everyone’s face.
The Supplies You Will Need For This Bunny Ear Tie
• Crochet Hook 3.75 mm (F), I highly recommend Furls Hook (affiliate link) or a Clover Crochet Hook (link below). I love both of these.
• Removable stitch markers if needed
• Yarn needle to weave in ends
• Flexible Hair Ties
• Pastels or Blush Makeup
• Makeup Brush or Q-tip
Yarn:
Lion Brand:
• Comfy Cotton Blend in Whipped Cream
Or WeCrochet Comfy Cotton Worsted Yarn
Any worsted weight yarn can be substituted as long as the gauge can be matched.
Yardage:
• 20 yards (19 m)
Measurements:
Length before placing onto hair tie:
6.25 inches (16 cm)l
Abbreviations:
• MC – Magic Circle
• sc – single crochet
• sc2tog – single crochet two together
• st(s) – stitch(es)
Skill Level:
• Easy/Advanced Beginner
Gauge:
• 6 sts and 4.6 rows = 1” (2.5 cm)
in single crochet stitch
Notes for the Bunny Crochet Hair Tie
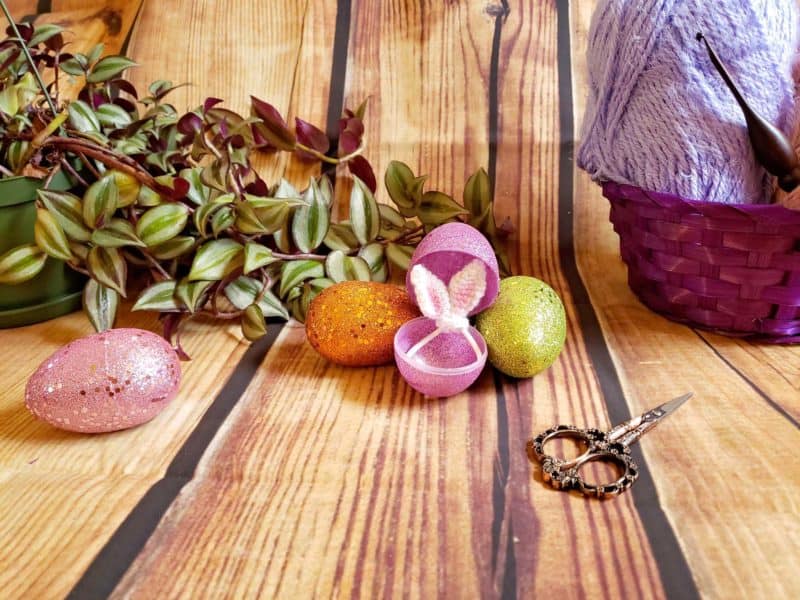
Fun and quick bunny hair tie can add a little hop in your step or even decor for your Easter eggs. These can also be gifts to be put inside plastic eggs for an extra surprise.
- This pattern is worked in the round continuously without joining. Use a stitch marker to keep track of rounds.
- When the pattern is written as sc 2 this means to sc in each of the next two stitches (2 stitches in total worked). When the pattern is written as 2sc, this means to sc 2 into the next stitch which increases the stitch count.
Magic Ring Video:
Invisible Decrease (sc2tog) Video:
Relax & Crochet
Upgrade to the Printable PDF
Beautifully formatted to print and relax while crocheting. The paid pattern includes:
Purchase this pattern on Etsy or Ravelry.
Instructions for the Bunny Hair Tie Crochet Ears
Rnd 1: Working in the Magic Circle, sc 4, do not join as this is worked continuously, use a stitch marker on each round. (4 sts)
Rnd 2: (2 sc first, sc 1 in next st) twice. (6 sts)
Rnd 3: (2 sc first, sc in each of the next 2 sts) twice. (8 sts)
Rnd 4: (2 sc first, sc in each of the next 3 sts) twice. (10 sts)
Rnd 5: (2 sc first, sc in each of the next 4 sts) twice. (12 sts)
Rnd 6: sc in each stitch around. (12 sts)
Rnd 7: (sc2tog, sc in each of the next 4 sts) twice. (10 sts)
Rnd 8: (sc2tog, sc in each of the next 3 sts) twice. (8 sts)
Rnd 9: (sc2tog, sc in each of the next 2 sts) twice. (6 sts)
Rnd 10: (sc2tog, sc in each of the next 1 st) twice. (4 sts)
Rnds 11-20: sc in each stitch around (a total of 40 sc stitches - the stitch count per rnd is 4)
Rnds 21-29: Repeat rows 2-10.
Join The Kindest Community
Join our vibrant community of crafters on Facebook today. Whether you enjoy crafting with others or simply have burning questions, we've got you covered - join us now!
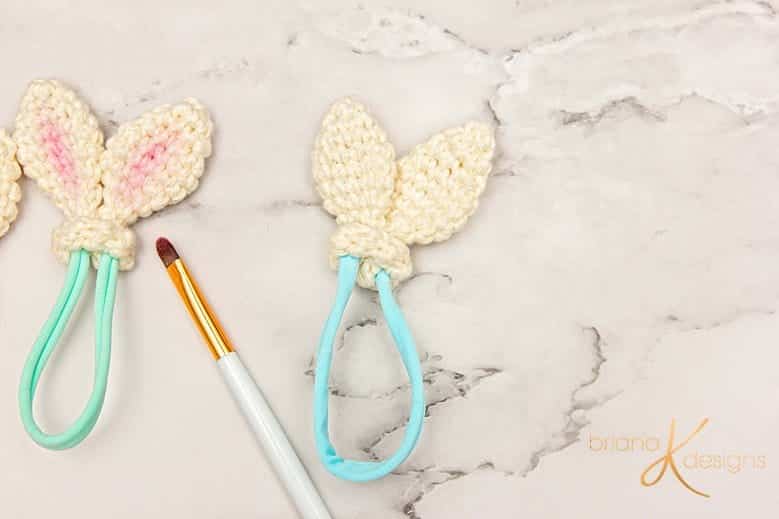
Finishing the Crochet Hair Tie:
Fasten off and use the tail to weave through the remaining stitches and close the opening.
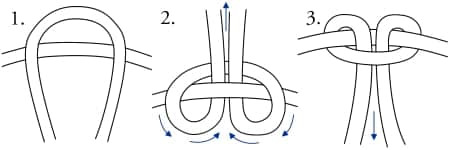
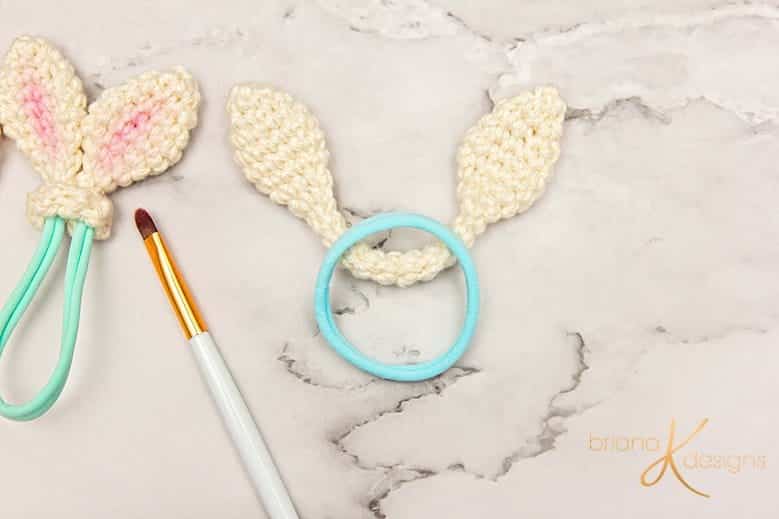
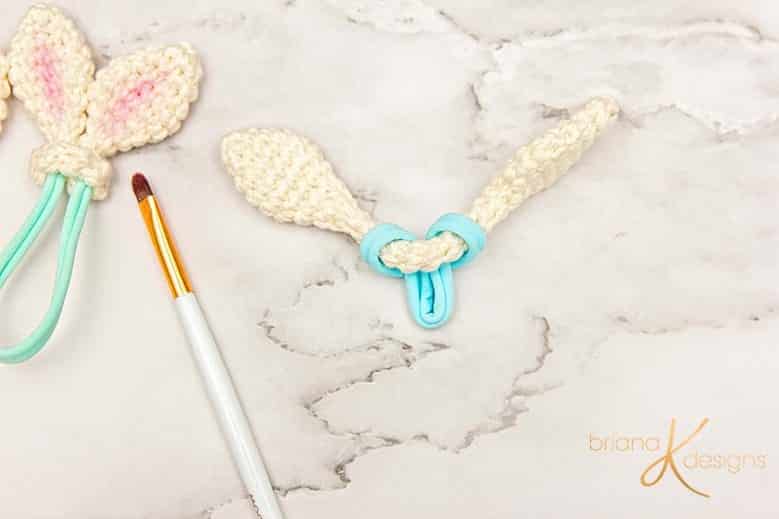
Assembly for Crochet Bunny Hair Tie:
To attach the bunny ears to the hair tie we will be using a larks head knot. See images below:
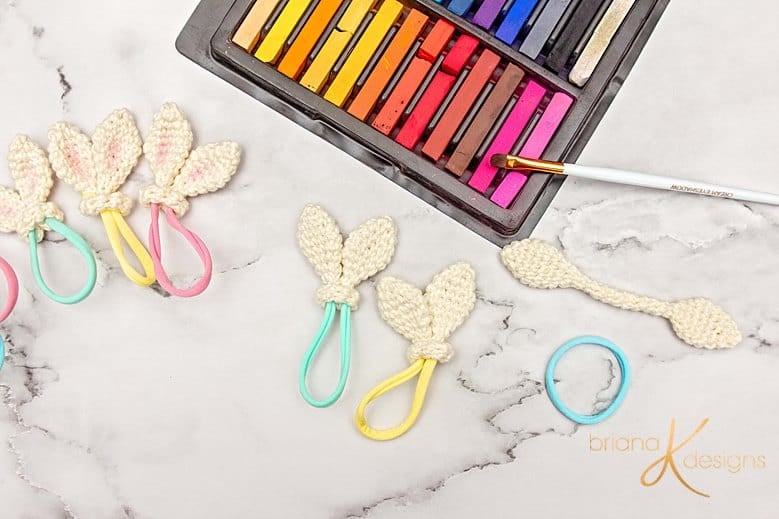
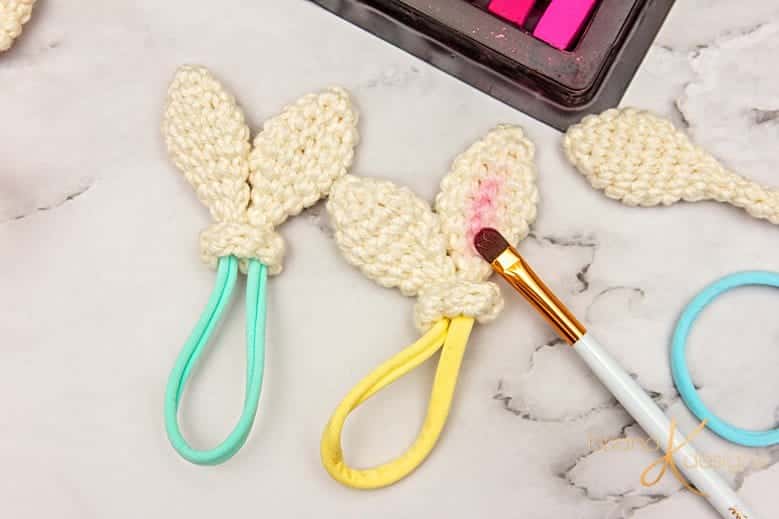
Adding Some Pink to the Inner Bunny Ear
Using a make-up brush or q-tip, brush the inner ear with either a pink chalk pastel or even a blush from your make-up stash. Happy Easter Crocheting!
I hope you have enjoyed making the Crochet Bunny Hair Tie! Not only is this a cute hair accessory, but useful as well! You might also enjoy crochet more bunny things with the Fluffy Bunny Crochet Pillow Free Pattern or the Newborn Bunny Crochet Pattern.
Well That Was Fun! What's Next?