Purchase the PDF version here

Supplies:
4mm crochet hook, 4/Medium weight yarn in any desired colors, and pink for the cheeks. 9mm safety eyes, tapestry needle, scissors, and stuffing.
Additional Information:
Difficulty: Easy
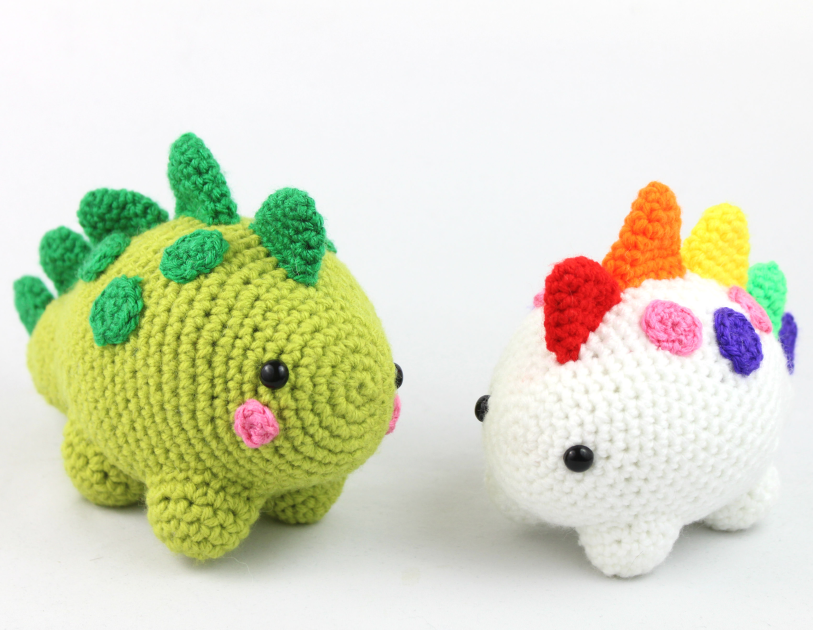
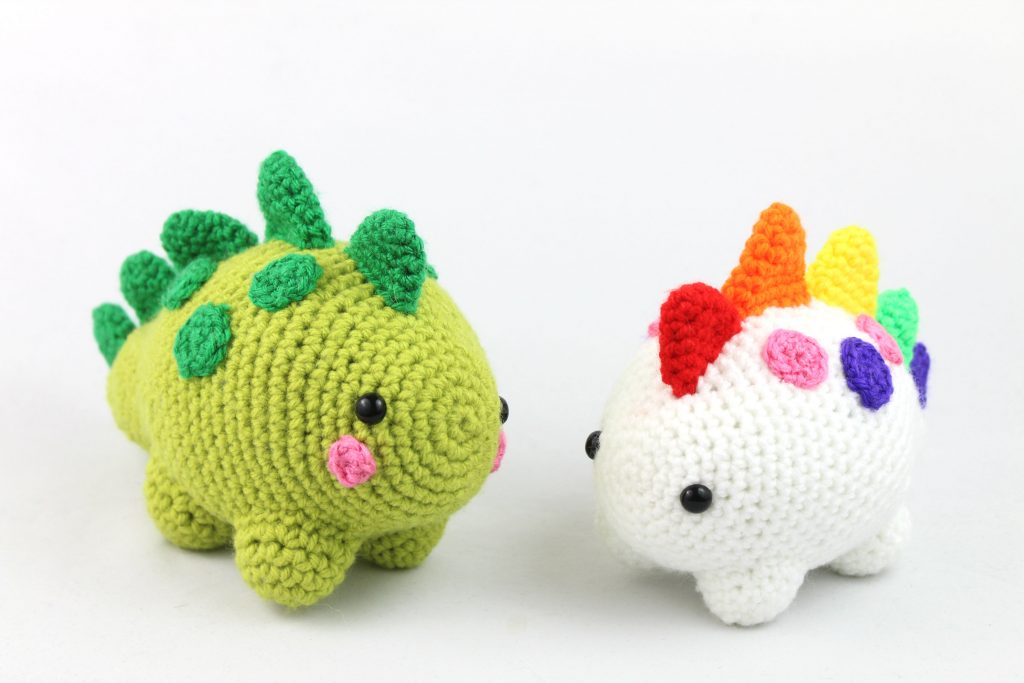
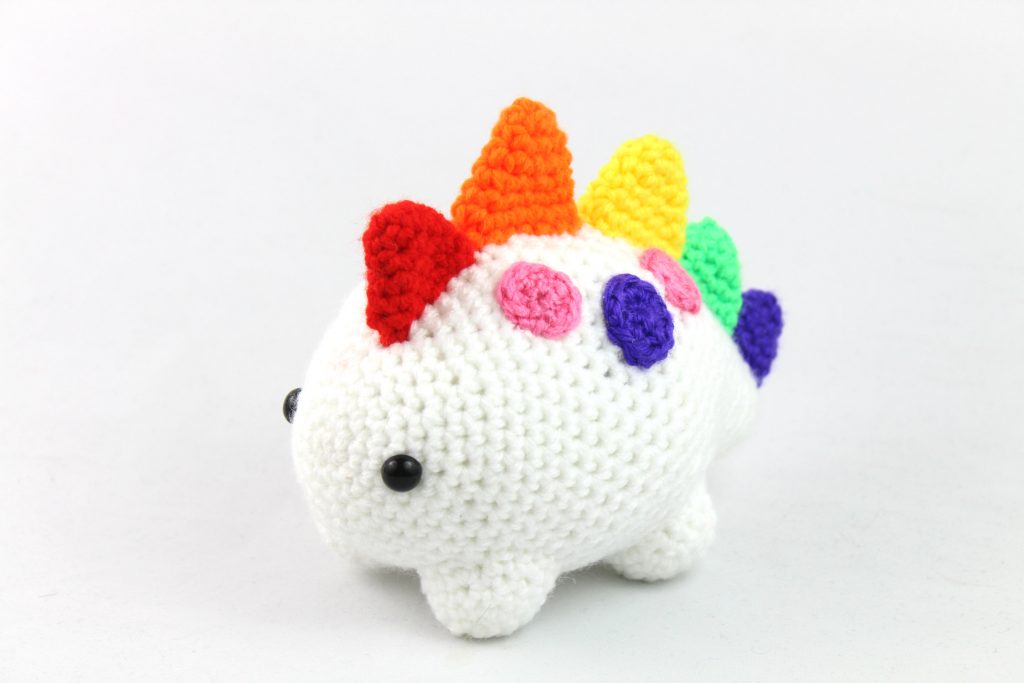
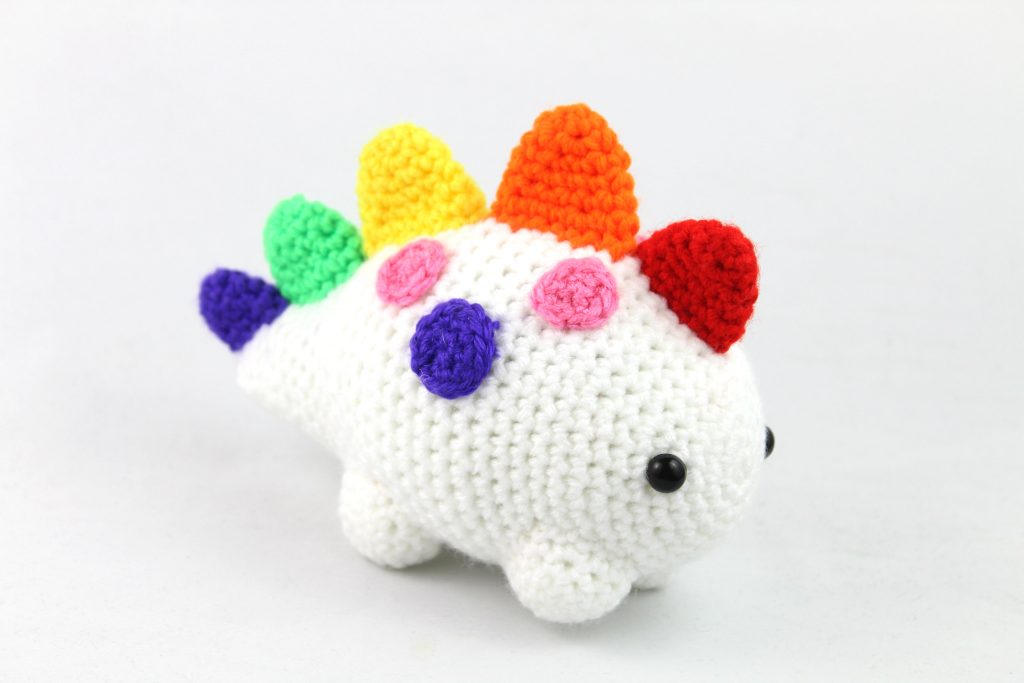
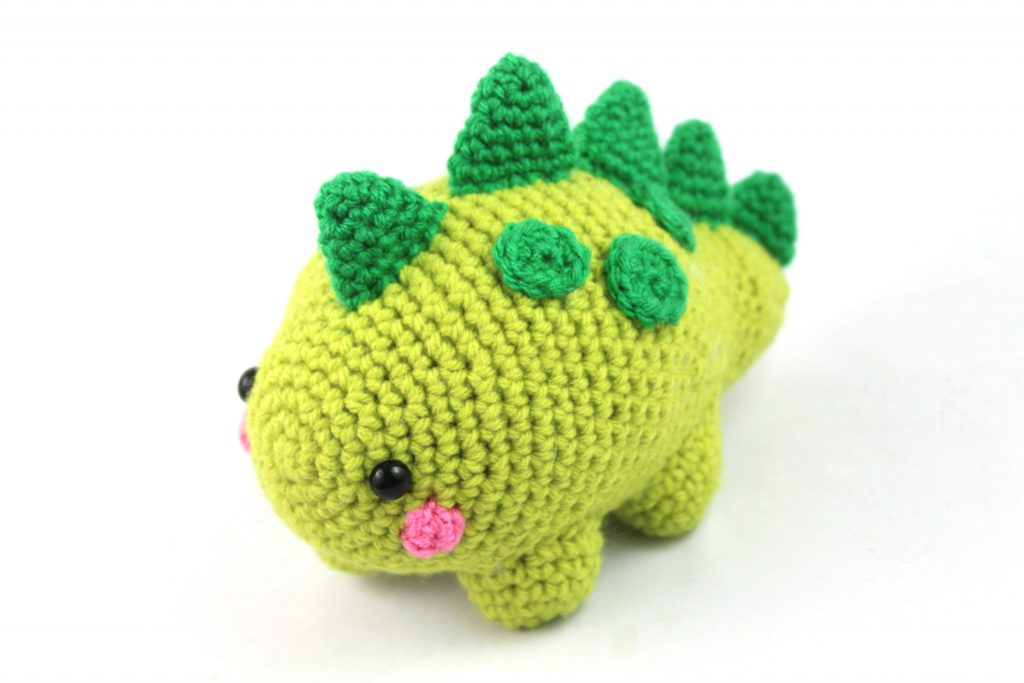
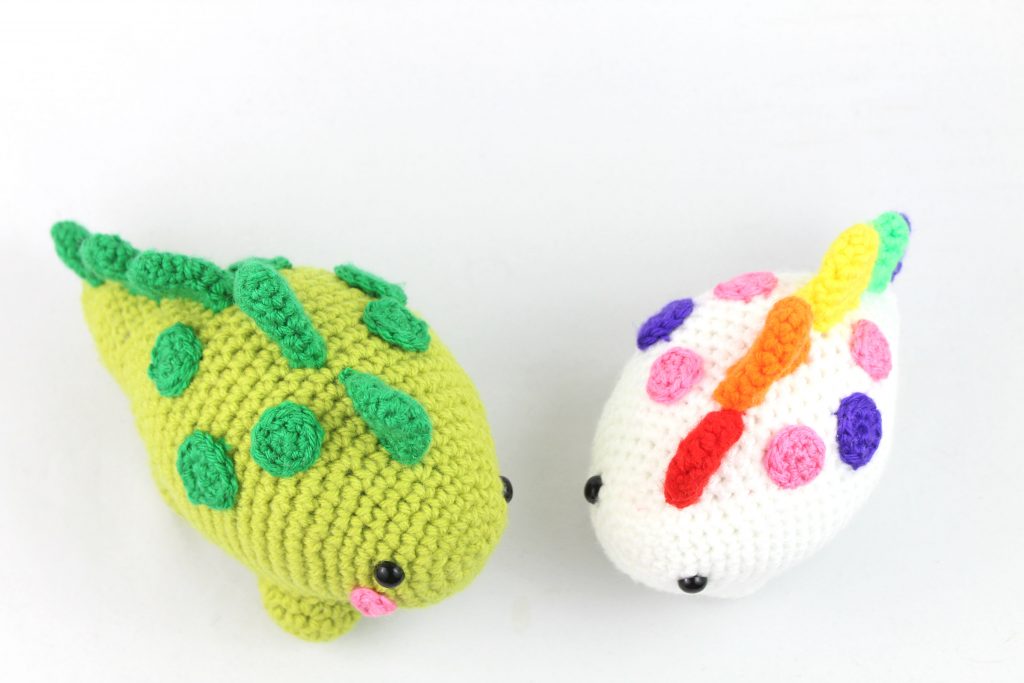
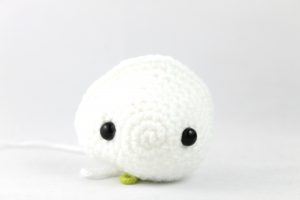
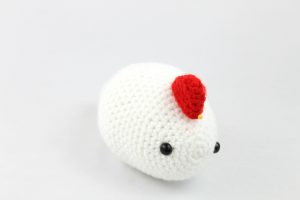
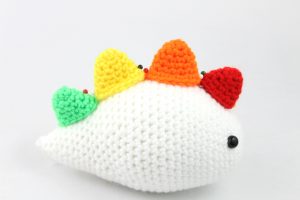
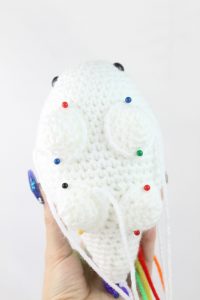
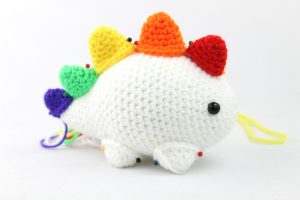
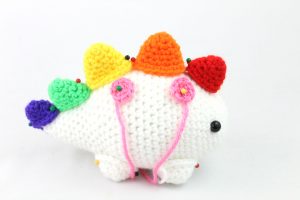
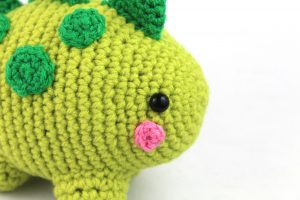
This pattern makes a cute dinosaur! This pattern refers to “Main Color”, which is the main color you want your dinosaur to be. I used green as the “Main Color” for one and white for the other. You can use any “Main Color” you want. First, we start by making the body. Next, we make all the spikes which are different sizes and pin them on in order shown in the pattern. Next, we make the stubby legs, then create the spots. Finally, you can make little cheeks if desired.
Dinosaur Body:
In Main Color
Round 1: 6 Sc in Magic Ring (6)
Round 2: *Inc* all around (12)
Round 3: *Inc, Sc* all around (18)
Round 4: *Sc* all around (18)
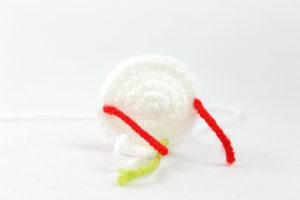
Round 5: Inc in the next st, Sc in the next 2 st. Sc in the next st. Sc in the same st and add a different colored st marker to Sc just made. This marks the eye. Sc in the next 2 st. Repeat *Inc in next st, Sc in next 2 st* 2 times, Sc in the next st, Sc in the same st and add a different colored st marker to the Sc just made. Sc in the next 2 st, Inc in the next st, Sc in the last 2 st (24)
Round 6: *Sc* all around (24)
Round 7: *Inc, Sc 3* all around (30)
Round 8: *Sc* all around (30)
Round 9: Sc in the next 9 st. Repeat *Inc in the next st, Sc in the next 2 st* 6 times, Sc in the last 3 st (36)
Round 10: Sc in the next 9 st. Repeat *Inc in the next st, Sc in the next 3 st* 6 times, Sc in the last 3 st (42)
Add eyes here
Round 11-21: *Sc* all around (42)
Round 22: *Dec, Sc 5* all around (36)
Round 23: *Sc* all around (36)
Round 24: *Dec, Sc 4* all around (30)
Round 25: *Sc* all around (30)
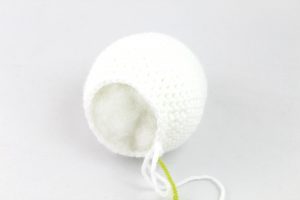
Stuff here. Add additional stuffing while doing the next rounds.
Round 26: *Dec, Sc 3* all around (24)
Round 27: *Sc* all around (24)
Round 28: *Dec, Sc 4* all around (20)
Round 29-31: *Sc* all around (20)
Round 32: *Dec, Sc 3* all around (16)
Round 33: *Sc* all around (16)
Round 34: *Dec, Sc 2* all around (12)
Round 35: *Sc* all around (12)
Round 36: *Dec, Sc* all around (8)
Round 37: *Dec* all around (4)
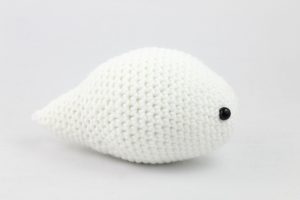
Finish off. Sew closed and set aside body for now.
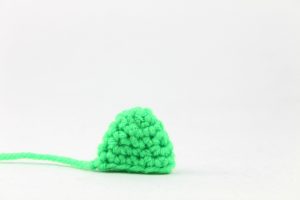
First Spike:
In Any Color
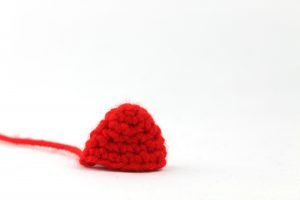
Round 1: 6 Sc in Magic Ring (6)
Round 2: *Sc* all around (6)
Round 3: *Inc, Sc* all around (9)
Round 4: *Sc* all around (9)
Round 5: *Inc, Sc 2* all around (12)
Round 6: *Sc* all around (12)
Finish off and pin as shown.
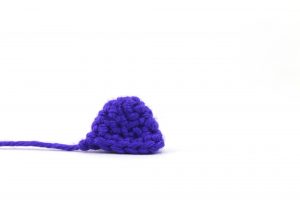
Second & Third Spike:
In Any Color
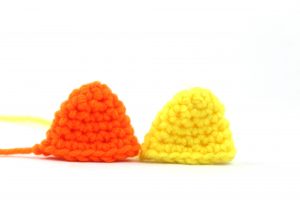
Round 1: 6 Sc in Magic Ring (6)
Round 2: *Sc* all around (6)
Round 3: *Inc, Sc* all around (9)
Round 4: *Sc* all around (9)
Round 5: *Inc, Sc 2* all around (12)
Round 6: *Sc* all around (12)
Round 7: *Inc, Sc 2* all around (16)
Finish off and pin as shown.
Fourth Spike:
In Any Color
Round 1: 6 Sc in Magic Ring (6)
Round 2: *Sc* all around (6)
Round 3: *Inc, Sc* all around (9)
Round 4: *Sc* all around (9)
Round 5: *Inc, Sc 2* all around (12)
Round 6: *Sc* all around (12)
Finish off and pin as shown.
Fifth Spike:
In Any Color
Round 1: 6 Sc in Magic Ring (6)
Round 2: *Sc* all around (6)
Round 3: *Inc, Sc* all around (9)
Round 4: *Sc* all around (9)
Finish off and pin as shown.
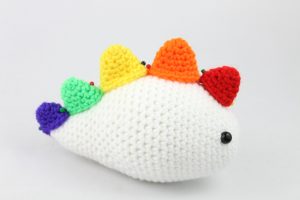
All spikes will look like this now. Sew them on now if desired.
Legs: (Make 4)
In Main Color
Round 1: 6 Sc in Magic Ring (6)
Round 2: *Inc* all around (12)
Round 3-4: *Sc* all around (12)
Round 5: *Inc, Sc* all around (18)
Finish off and pin on as shown.
Sew on legs now if desired. Stuff legs before fully closing.
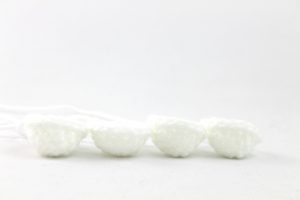
Small Body Dots: (Make 4)
In Any Color
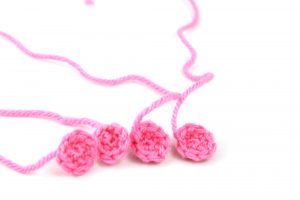
Round 1: 6 Sc in Magic Ring (6)
Round 2: *Inc in next st, Sc in next st* all around (9)
Finish off and pin 2 on each side as shown.
Big Body Dots: (Make 2)
In Any Color
Round 1: 6 Sc in Magic Ring (6)
Round 2: *Inc* all around (12)
Finish off and pin one on each side as shown.
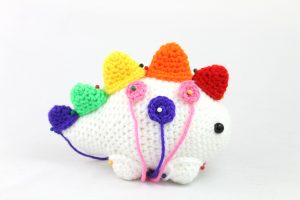
Sew on all dots now. Sew on other pieces if you haven’t already!
Cheeks: (Optional, Make 2)
In Pink
Round 1: 6 Sc in Magic Ring (6)
Finish off and pin each cheek on the sides of the mouth area. Sew on.
 Done! If you finished this pattern, I would be SO HAPPY if you


68 Comments
How do i print this pattern.
Hi there,
You can purchase the PDF ready to print version of this pattern here: https://stringydingding.com/product/dinosaur-amiugurumi-pdf/. Please feel free to let me know if you need any help with the pattern or have any questions. Thanks!
Is the st count on row 22 in the body correct?
Hi Katie, I just checked and it’s correct 🙂 If you would like some help please let me know!
Thank you….. I’m not very good at maths and still learning the art of amigurumi …. not the best combination 🤣
It’s totally okay, I miscount all the time! If your stitch count isn’t too off, you can just add a little increase stitch in the round that’s missing one, then your stitch count will be on track 🙂
These are totally adorable! Thanks for sharing
Hi Ali! I’m so glad you like them and I hope you made one 🙂 Thanks so much for your kind comment. Have a great day!
Hello!
For round five: Repeat *Inc in next st, means 4 SC in the same st (2 inc in the same st) or it means 1 inc and another inc in the next 2 st?
Thanks
Hi there, thanks for your question 🙂 So Round 5 means: Single crochet 2 times into the next stitch (so one increase), then single crochet 1 time in each of the next 2 stitches. You repeat this around, adding the eye stitch markers when called for. Please feel free to let me know if I can clarify further or if you have any other questions!
what does INC mean?
Hi! “Inc” means increase. To make an increase, simply make two single crochets into one stitch. If you need help, I can find some videos on how to make the increase stitch 🙂
This “little guy” turned out pretty large! I was surprised. I used a 3.5 mm hook and worsted weight yarn. Do you have a pattern for a smaller dinosaur? I’m looking for something that will only be about 3 inches long or so… Or would you be willing to help me modify this pattern to shrink the size?
Hi Nikki! I have a reptile pattern that is pretty small you may like. It doesn’t look like this dinosaur, but you can make a dinosaur from it: https://stringydingding.com/scraptacular-reptiles-dinosaur-lizard-and-alligator-free-crochet-pattern/
Unfortunately altering this pattern to make it about 3″ would call to making some pretty big changes but if you would really prefer that I can set aside some time to write it up 🙂
Let me know what you think, I’m happy to help in any way I can!
So adorable!! What is the final size of this? Thank you!
Thank you! The finished size is around 6.5″ width by 4″ tall. It may come out a different size for you depending on tension, hook used, and yarn used!
These are the cutest lil guys I have ever seen 😍 I’m making me a whole herd of them 😍
Aww thank you that’s so awesome to hear! I’m so happy to hear that you like this pattern. I would love to see your little herd of dinos ❤️
Thank you so much for this sweet dino! I love how detailed the pattern is! I can’t wait to make him!
Hi Brianna, thank you so much! I’m really happy you like it 🙂 That’s so nice of you to say, you gotta show me a picture when you make him!
He’s so cute! Is it okay if I sell products using this pattern? Thank you.
Thank you so much! Yes you can sell your finished dinosaur 🙂
This guy was SO much fun to make. A friend of mine had a baby and her nursery theme was “Rainbow Space Dinosaurs” so I was excited to see this pattern. He’s just perfect.
Thank you!!
These new dinosaurs are really cute. Your work is always perfection. Any child would love them.
Hi Christine, aw that is so very nice of you to say! I really appreciate it 🙂 My goal is to have all the kids around the world have at least 1 handmade amigurumi, so I hope lots of people are able to make something cute and give it to a child! Thank you again Christine, you are so very kind 🥰
I love this pattern! I’ve made a few of these guys and my kids adore them. I was wondering if it would be okay if I sell some of the completed projects on my etsy shop. I would of course credit stringydingding for the pattern design and include a link to the pattern. Please let me know. Thanks so much for sharing this and your other adorable amigurumi patterns!
I actually just noticed a comment where you told someone else it’s okay to sell finished projects. So I’m going to go ahead and list my dinos. Will include link to your pattern on etsy in the listing. 🙂
Thank you so much for sharing this lovely dinosaur pattern. I have just finished my first one and plan to make a few more for a Christmas present for my daughters friend as she adores dinosaurs..
Hi Ela! Thank you so much for your kind comment 🙂 I’m so glad that you are going to make quite a few, that’s awesome! I’m sure your daughter’s friend will LOVE her gift! Thank you so much for your kind comment ❤️
Are the spikes stuffed? I’m almost finished with him. Making for a little boy in the burn unit, was requested. I’ve never made any animals before.
Hi Jackie! The spikes aren’t stuffed, just sew them on with no stuffing 🙂 That is so sweet of you to make that for the little boy, I bet he will be so happy to get that! How were you able to donate it to the hospital? I would love to try and do something like that, too 🙂 Thanks so much for the question Jackie, I bet your first animal came out awesome!
Made a lot of mistakes, but still turned out okay. 😀
Really a fun pattern!
Oh my gosh that is SO cute!!! 😍 I would never have guessed you made any mistakes making it, because it looks so good ❤️ I love the little doily he’s on, it matches him really good! Aw thank you so much for sharing, you did an amazing job 🙂
Hello, I am a little confused on round 9 and 10 on the main body. with the sc and the repeats n such
Hi there! I think explaining the pattern in a bit more detail might help 🙂
For repeats, we will repeat what is inside the stars ** for the stated amount of times. Let’s look at Round 9:
Round 9: Sc in the next 9 st. Repeat *Inc in the next st, Sc in the next 2 st* 6 times, Sc in the last 3 st (36)
So make 1 single crochet into the next 9 stitches. Now we will repeat what’s inside the stars for the stated amount of times. It says *Increase in the next stitch, Single crochet in the next 2 stitches* 6 times.
(So repeat making 1 increase in the next stitch, then 1 single crochet in the next 2 stitches, a total of 6 times). Once we’re done repeating that, we will make 1 single crochet in the next 3 stitches. At the end of this round we will have 36 stitches!
This will be similar for Round 10:
Round 10: Sc in the next 9 st. Repeat *Inc in the next st, Sc in the next 3 st* 6 times, Sc in the last 3 st (42)
So make 1 single crochet in the next 9 stitches. Now we will repeat what’s inside the stars **. Repeat *Increase in the next stitch, then make 1 single crochet in the next 3 stitches* repeat that a total of 6 times. After this, we will make 1 single crochet in the last 3 stitches.
I hope this was able to help! Please let me know if I can answer any other questions or clarify anything 🙂
Thank you so much! This is my first time working with these types of projects and your explanation helps so much!!!
Hi there! I’m new to amigurumi (not to crocheting) and I’m wondering on how to sew the spikes on without them losing their “triangle” shape?
Hi Caprial! To make sure the spikes stay in a triangle, make sure to keep the spikes flat. So when you pin them on to sew, keep the piece folded in it’s flat form, don’t pin it on in an open circle form. I hope that makes sense but please let me know if I can clarify!
The other thing I suggest is to NOT stuff it. If you stuff it the spike will turn more into a blob 😅 So keeping the spike flat and unstuffed will help keep it’s triangle shape! Then sew on going from one stitch of the body, to the next stitch of the spike. Repeat this until the spike is fully sewed on. Once it’s sewed on, tie the tail end of yarn into a very firm knot and bring into the dinosaur to hide!
I hope this helps 🥰 If I can answer any questions please let me know!
How do you recommend attaching the spikes? I am excited to try this pattern!
Hi Kaitlyn! To attach the spikes I always recommend pinning them on before sewing. What I did was make each spike, then pin them all on at the same time. I would readjust them as needed to make sure they fit and looked the best they could be. After this, I sewed them on using the tail of yarn left on the spike. I would go from the body to the spike’s last round stitches. I repeated that until the spike was completely sewed on 🙂 I hope this was able to help, but if you have any questions please just let me know! ♥️
Thanks for the pattern! I wish I was better at sewing, but otherwise these turned out perfect.
Hi Liz! Awww I think your dinosaur came out beautifully, I would never have guessed you had an issue with sewing because it looks perfect! I love that you chose to do a colorful rainbow dinosaur, it looks so fun ❤️ Thank you so much for sharing a picture!
The dinosaur is so cute! Unfortunately, I seem to be having trouble with the pattern since the shape of my dinosaur is quite different from yours (more of a bullet train shape). I’m not sure where I went wrong? I think the bullet train shape comes from rounds 11-21, with 1 sc all around. Since it never actually increases, it creates a cylinder shape instead of the raindrop shape that your dinosaurs have. Also, the nose is much “sharper” than yours. Any advice? Thanks in advance!
Hi there, I’m glad you like the pattern! I hope I can help with this 🙂 So our last increase round in Round 10, meaning that Round 11-21 will be pretty straight because we’re making 1 Sc all around. So if your body shape is coming out different, I would recommend making sure you have the right stitch count leading up to Round 11! Double check that Round 10 has the correct number. If it doesn’t undo the round and make sure Round 9 has the correct number. Find a round that has the right stitch count and continue from there 🙂 It may be a matter of a wrong stitch count that makes yours shaped differently. So if you were confused by any of the instructions from Round 1-10, please let me know! I’ll write out the round in more detail to clarify anything 💖
However, if you have the correct stitch count, continue making the dinosaur because as we reach Round 22, it will start to decrease and make more of that tear drop shape.
As for the nose, it shouldn’t be too pointy. I think what could cause this is if you also had a stitch count error, or you accidentally added another round of single crocheting all around. If you don’t mind, post a picture of your dinosaur and I’ll see if I can figure out what specifically made yours turn out different! I hope so far I was able to help 🙂 Please let me know how things go!
I made these three dinos for nephews 3rd birthday. I love them almost as much as I love him 🥰
I loved making this little guy! Thank you for the amazing pattern!!
Ooooooh I love your dinosaur, Jax! He reminds me of an ice-y dinosaur because of the blue and white 🙂 And I love that you added blush, I wish I had done that too! Thank you so much for sharing a picture. I’m super happy you had fun making it! 😍
Hi there! Thanks for your comment 🙂
I know you didn’t ask for my advice, but I have to mention this: Please be mindful about what you say to others. People are people, and words don’t hurt any less whether it’s through a screen or in person. You never know what somebody is going through, and a comment like yours can really negatively impact somebody. To be honest, a few years ago had I received your comment I for sure would have cried and been depressed the entire day. Your comment for sure would have stuck with me. If you dislike something that’s 100% fine, but please be conscious of how you express your opinion to others.
I understand from the “viewers” perspective that it may be frustrating to have the free pattern online but not be able to print it for free. Please understand that from my perspective, many, many, many hours go into creating just 1 free pattern. I put out 1 free pattern every week, so quite literally every day I’m working on creating the next free pattern 😛. To put it simply, I have to create the actual toy itself, undo and redo the toy multiple times to get it just right, scribble down my pattern notes. Then, I have to redo the pattern again (so crochet the toy from start to end again. I’m sure you understand just how long it can take to make 1 amigurumi!) . This time I have to erect my lighting set up to take photos of every single step to put in the free pattern. After this I import the photos to my computer and edit each individual photo! Then I have to take my scribbled down pattern notes and correctly write out the entire pattern to my computer. I also have to get the pattern tested by helpful volunteers! After this, I create the printable PDF which takes many hours, but I put lots of hard work into creating the PDF to make sure everything is error free and pretty! I then have to copy and paste every section and photos from the PDF to put for free on my website which also takes a few hours.
As you can see, a lot goes into making just 1 free pattern. As much as I genuinely would LOVE to give away everything away for free, I simply can’t. I give as much as I can away for free, but if it weren’t for fellow crocheters supporting my small business through the $1.99 PDF pattern sales, I couldn’t even put in the time to make these patterns because I would have to have a physical job that demands time away from pattern creating. If you’d like to print this pattern, you can purchase it for $1.99 here. However, this is never required as you can see the free pattern in full online. The best way to crochet from my patterns is to view them as you crochet by your laptop, tablet, phone, ereader, etc. ❤️
I hope you can see where I’m coming from and that you can find enjoyment in the patterns I work hard to create 🙂
Olive
Your response to the above comment was incredibly well versed and polite in the face of such rudeness.
I just wanted to commend you on your handling of this…
I really love this pattern! This was my first crochet project ever and my first amigurumi. I made quite a few mistakes, but I love how my little dinosaur turned out regardless. Thanks for the amazing pattern, I will absolutely make more of these 🙂
Hi Dunja! Wow, I’m amazed that is your first crochet project EVER! It looks beyond amazing, and to be totally honest, I would never have guessed that was your first project! You are a natural when it comes to crochet 😍 Thank you so much for the kind words, I’m so glad you had fun with this pattern. You did an AMAZING job 🙂 Thank you for sharing a picture!
I’m having some trouble with the spikes. They are coming out very round.
Hi Abigail!
Thank you for letting me know! The spikes will come out round, but before we sew them on, you will squish them in half so they become flat 🙂 If you want, you can show me a picture of yours so I can see what may be going on. Let me know if this works for you. If not, I’m happy to help further!
Olive
Thank you so much for this pattern. This was my first amigurumi and I love the way it came out. This little guy put a smile on my family’s faces and my grandson adores him.
I had a question regarding sales of the amigurumi made from the pattern. Would it be acceptable to sell these amigurumi online or in-person? To clarify, I am NOT discussing the sale of the pattern just the items made from the pattern. Thank you.
Hi Rachel! Yes, you can sell the physical toy you make from my patterns 🙂
Love this little guy. Made this for my granddaughter. Thanks so much for the pattern and explicit directions.
Love this little guy. Thanks so much for the pattern and explicit directions.
I love the pattern 😃😃
Great pattern! Super simple and cute. Used thread for the pink cheeks instead of yarn on the green one. Thank you for the pattern!
thank you so much for the tutorial! but i’m having a bit of trouble on the 5th round 😭 it says that we should end up with at least 24 stitches, but i always end up with either 21 or 22. does “Sc in the same st and add a different colored st marker to Sc just made.” basically mean to Increase that stitch? so instead of one it’d be two?
Tried my hand at making a mini version with embroidery thread and can say im very happy with this pattern :).
Love this I made lots of mistakes though ❤️
This little dino is SO CUTE! I saw this on Ravelry and knew I had to make it. I’m going to try making it using a really tiny hook so it fits into a terrarium I’m making! Thanks for the totally fire pattern!
Hey so I’m newer to crochet I am wondering does the number in the parentheses mean the number of stitches? Thanksss
These are awesome! Thank you so much for sharing the pattern. (I plan to make a couple as soon as I am able to get my yarns out of storage.)
So this was my 3rd or 4th crochet project and the outcome was awesome! I’m super stoked about this dino (who is kinda medium sized).
2 years ago I started on my crocheting journey and this dino was the very first project (and amigurumi) that I made. I decided to make this lovely dino again and I’m amazed with how much I’ve progressed over the years. Thanks again for the amazing pattern, I’ll definitely make many more of these cuties❤️