
Sweet Spring Birds – Crochet Pattern
Pin it for later!
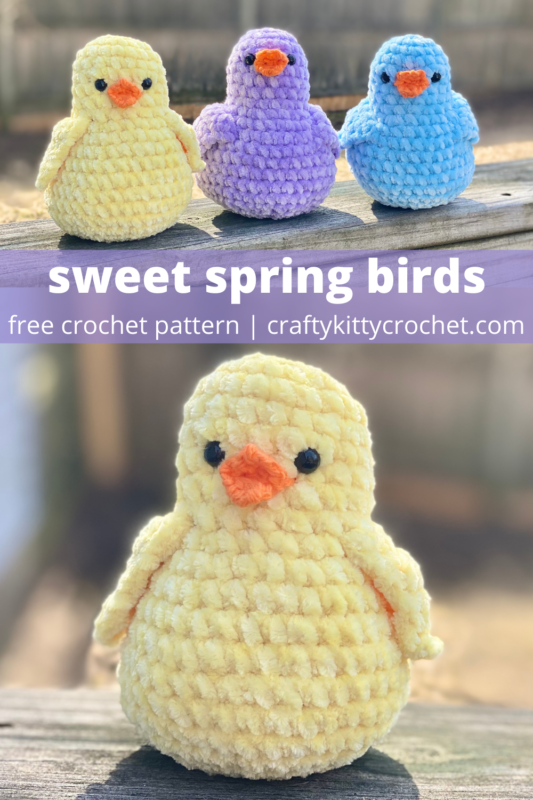
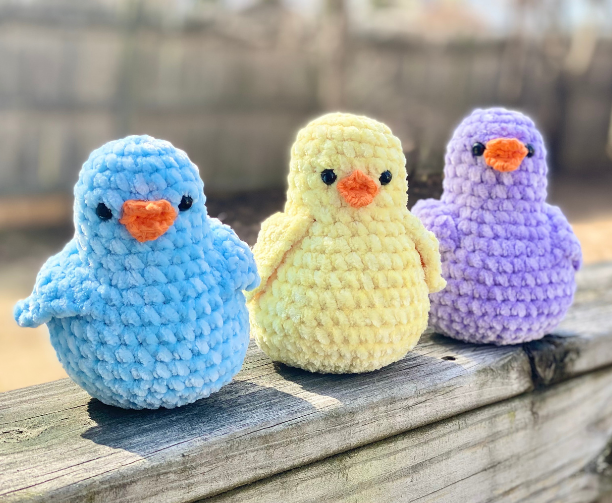
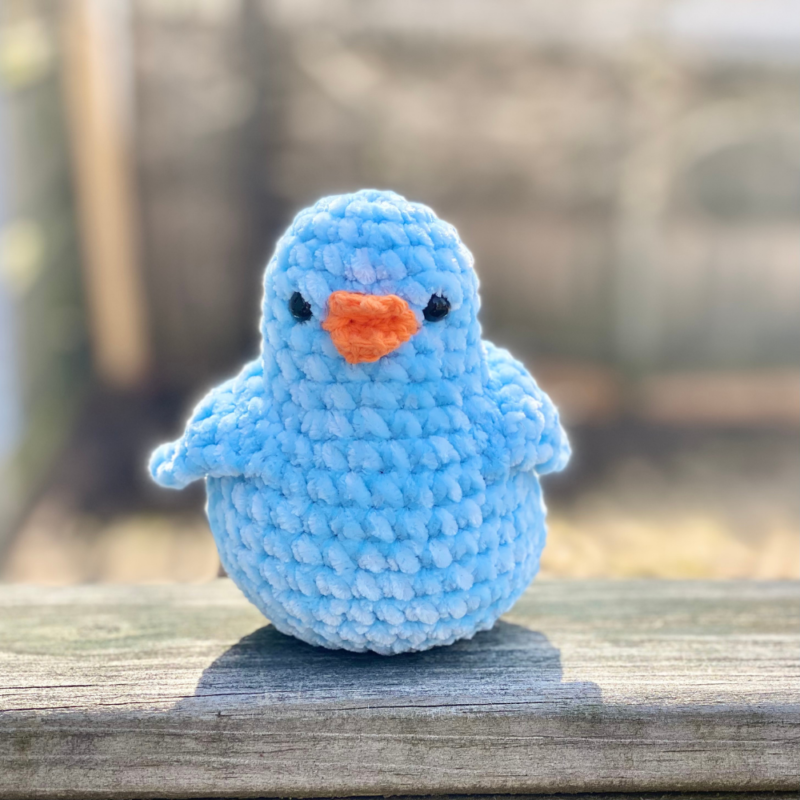
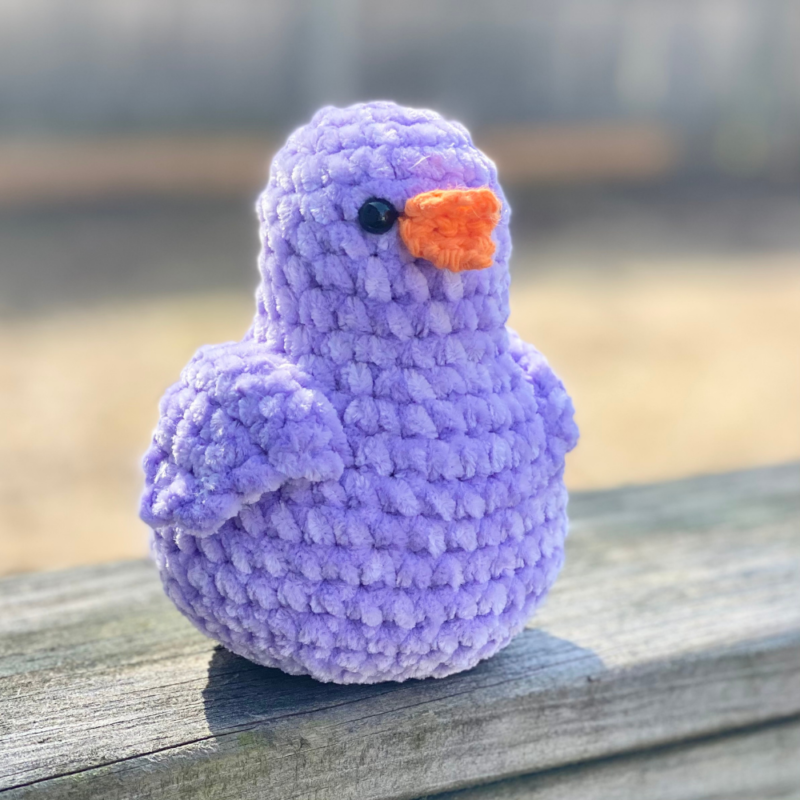
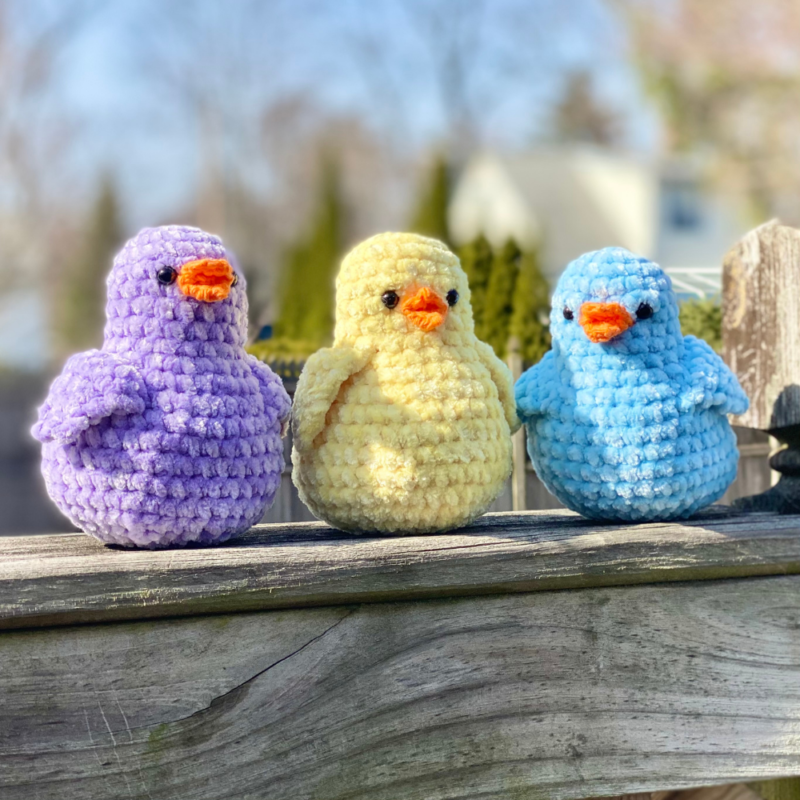
Celebrate spring – or any season – with these sweet, small, fun and easy to make birds! They’d be an adorable addition to any Easter basket, and are also perfect as a cute plush toy or even decor all year round! The pattern is easy and works up fast. Made with chenille yarn, they are also incredibly soft to the touch. Kids of all ages will love these little birdies! Make a whole flock in just a weekend!
Sweet Spring Birds
Who doesn’t love the chirping of those first spring birds every year? For me, that’s the signal that nature is finally coming around to the idea of warmer weather. It’s probably one of the reasons why baby chicks are everywhere on Easter and spring merchandise! (Speaking of which, you can see more of my spring and Easter patterns HERE!) The best part is that the super soft chenille yarn I used to make these can be found at most Dollar Trees! And it doesn’t even take a whole $1 skein to make one of these cuties, either. They are pretty addictive to make, as well – they work up so quickly and easily that I couldn’t help but make a bunch in different colors!
If you’re not able to find this yarn at your local Dollar Tree and/or would prefer to order online, you can find a very similar yarn by Premier on Amazon called “Parfait”. It comes in various colors like the ones I found at the dollar store!
Looking for the ad-free PDF? You can find one in my shop HERE!
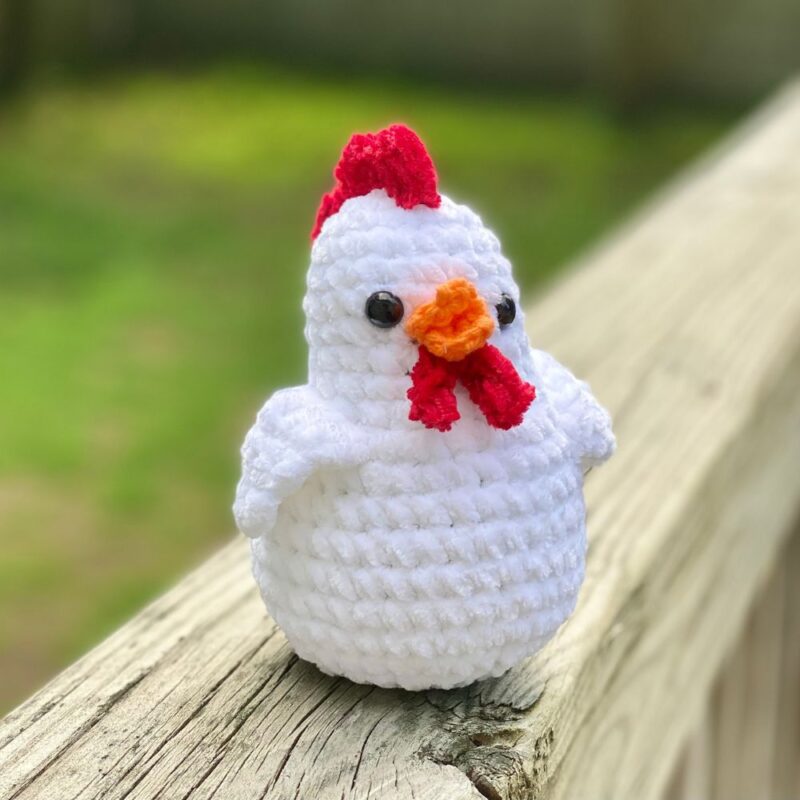
Update June 2023: There’s now a pattern mod to turn these birds into chicken/roosters! Find the Pattern Mod HERE!
Supplies
Size 7 / 4.5 mm crochet hook
Size D-3 / 3.25 mm crochet hook
1 skein of Premier Just Chenille in Main Color; 1 skein in Contrast Color (optional) – super bulky, approx. 45 yds used (35 in Main Color, 10 yds in optional Contrast Color)
*Colors used in photos are Yellow, Lavender, and Light Blue
Lily Sugar n Cream in Orange (medium weight; a few yards needed for Beak)
1 pair 6 mm safety eyes (per bird)
Fiberfill stuffing
Yarn Needle
Scissors
Abbreviations
*= indicates beginning/end of a section to be repeated
BLO = back loop only
Ch = chain
Rem = remaining
Rep = repeat
Rnd(s) = round(s)
Sc = single crochet
Sc2tog = single crochet 2 together
Sc3tog = single crochet 3 together
St(s) = stitch(es)
Gauge
Exact gauge is not essential to this project.
Size
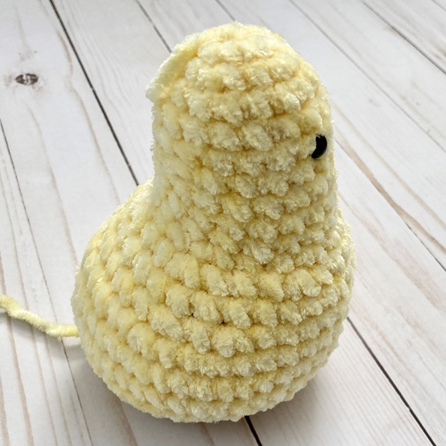
Finished length measures about 5.5 inches

How to Make This
Instructions
Head/Body
This piece is worked in continuous rnds; do not join. You may wish to use a stitch marker and move it up at the beginning of each new rnd.
Rnd 1 – With Main Color and 7 hook, make a magic ring. 6 sc in ring. (6 sc)
Rnd 2 – 2 sc in each st around. (12 sc)
Rnd 3 – 2 sc in next st, sc in next st; rep around. (18 sc)
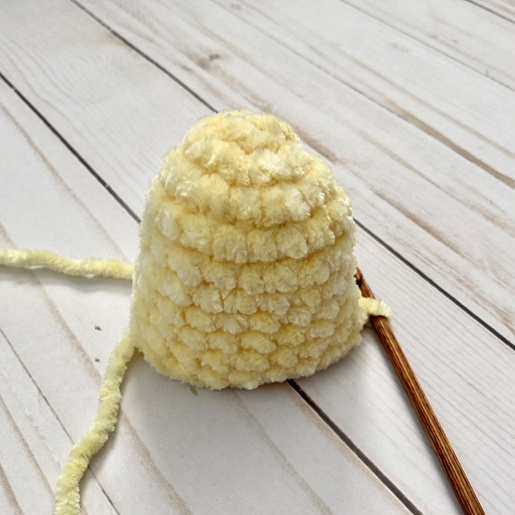
Rnds 4 – 9 – sc in each st around. (See first photo below.) (18 sc)
Rnd 10 – 2 sc in next st, sc in next 2 sts; rep around. (24 sc)
Rnd 11 – 2 sc in next st, sc in next 3 sts; rep around. (30 sc)
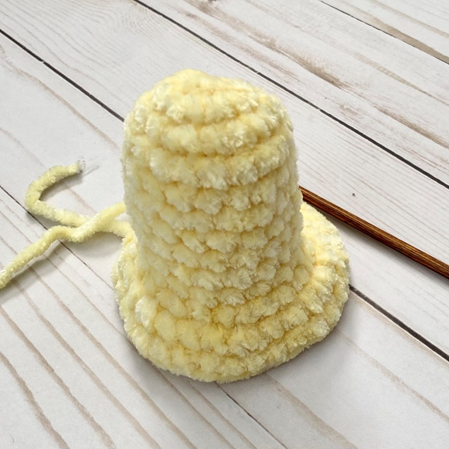
Rnd 12 – sc in each st around. (See second photo below.) (30 sc)
Rnd 13 – *2 sc in next st, sc in next st.* Rep from * to * 4 more times. Sc in rem 20 sts around. (35 sc)
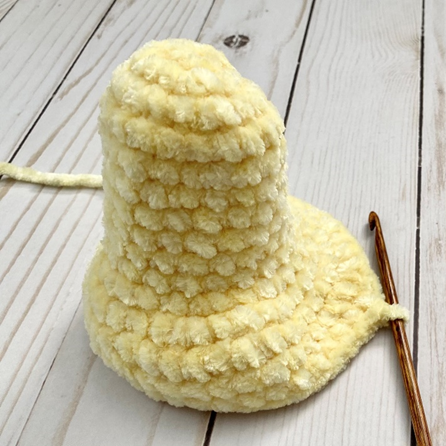
Rnd 14 – *2 sc in next st, sc in next 2 sts.* Rep from * to * 4 more times. Sc in rem 20 sts around. (See third photo below.) (40 sc)
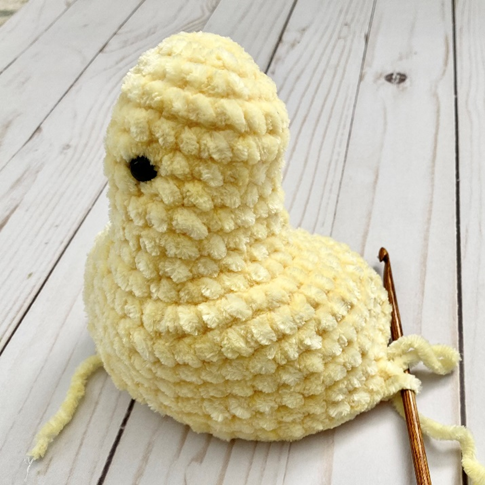
Rnds 15 – 17 – sc in each st around. Begin stuffing; attach safety eyes between Rnds 5 – 6. (See fourth photo below.) (40 sc)
Rnd 18 – sc2tog over next 2 sts, sc in next 3 sts; rep around. (32 sc)
Rnd 19 – sc2tog over next 2 sts, sc in next 2 sts; rep around. Finish stuffing. (24 sc)
Rnd 20 – sc2tog over next 2 sts, sc in next st; rep around. (16 sc)
Rnd 21 – sc2tog in each st around. (8 sc)
Rnd 22 – rep Rnd 21. (4 sc)
Fasten off, leaving small tail for sewing rem gap left over from Rnd 22. (Fifth photo below shows finished piece.)
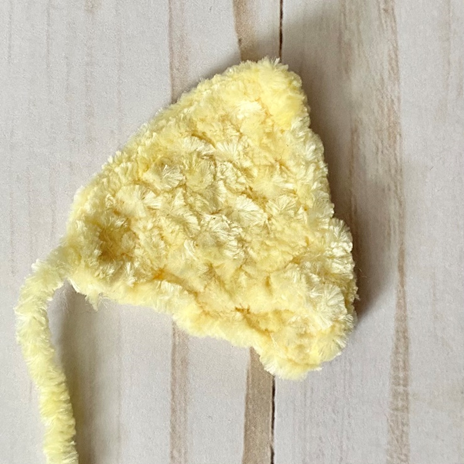
Wing (make 2)
With Main Color or Contrast Color and 7 hook, ch 2.
Row 1 – 3 sc in 2nd ch from hook. Ch 1, turn (3 sc)
Row 2 – sc in each st across. Ch 1, turn. (3 sc)
Row 3 – 2 sc in next st, sc in next st, 2 sc in last st. Ch 1, turn (5 sc)
Row 4 – sc in each st across. Ch 1, turn (5 sc)
Row 5 – 2 sc in next st, sc in next 3 sts, 2 sc in last st. Ch 1, turn (7 sc)
Row 6 – sc in each st across.
Fasten off, leaving long tail for sewing.
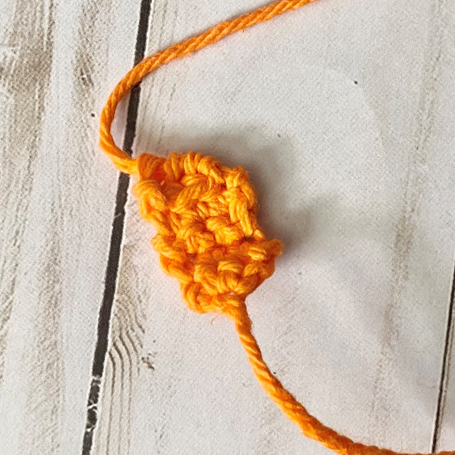
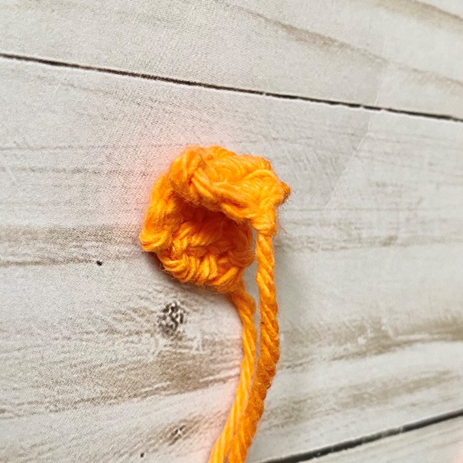
Beak
With Orange and D hook, ch 2.
Row 1 – 3 sc in 2nd ch from hook. Ch 1, turn (3 sc)
Row 2 – sc in each st across. Ch 1, turn. (3 sc)
Row 3 – working in BLO, sc in each st across. Ch 1, turn. (3 sc)
Row 4 – sc in each st across. Ch 1, turn (3 sc)
Row 5 – sc3tog over all 3 sts. (1 sc)
Fasten off, leaving long tail for sewing.
Finishing
Sew Wings to side of Body. Fold Beak and sew between Eyes. Weave in all ends.
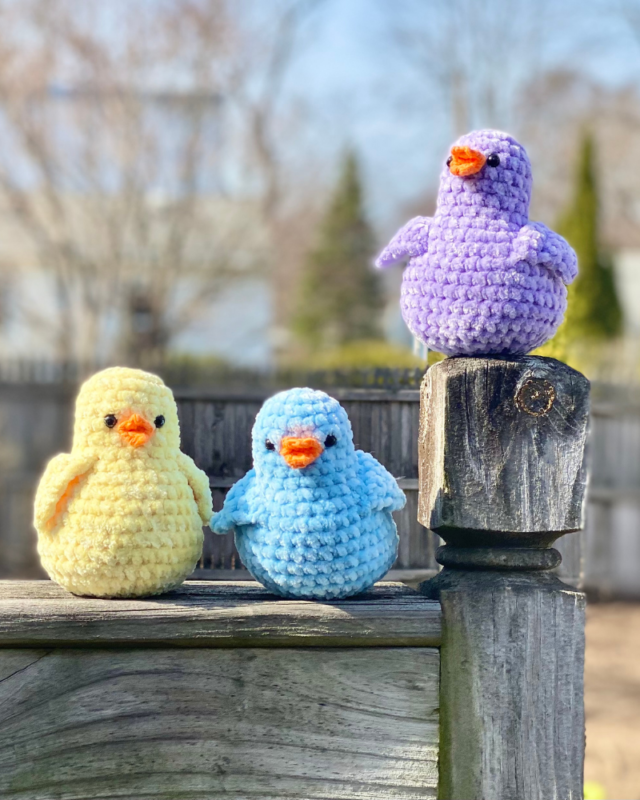
Here are the finished Birds!

I hope you enjoyed crocheting these birds along with me today. If you love fun, free patterns like this one, then please be sure to sign up for my email list to keep up to date with all my latest designs:
Also, please be sure to follow me on social media, and tag me in photos of your finished projects made from my patterns, so I can see your lovely work!
Don’t forget to pin it for later HERE!
And you can find that ad-free PDF pattern HERE!
Happy Crocheting!
COPYRIGHT:
This pattern is owned by Crafty Kitty Crochet (Melissa Moore). Any reselling or distribution of this pattern is prohibited. Sale of items made using this pattern is welcomed, but I do ask that credit/a link be provided back to my site, craftykittycrochet.com.


Comments (5)
Amigurumi Jelly Bees ~ Crafty Kitty Crochet
July 14, 2022 at 9:50 pm
[…] no secret that I’ve become a little obsessed with chenille yarn! My Hearty Mushrooms, Sweet Spring Birds, and Golden Puppy are great examples of this! And I have so many more fun, velvety soft projects in […]
Sweet Spring Birds Free Crochet Pattern
January 31, 2023 at 5:13 pm
[…] Sweet Spring Birds […]
25 Free Crochet Bird Patterns (Amigurumi Pattern) – Blitsy
March 16, 2023 at 10:50 am
[…] Discover creative crochet bird patterns to add a touch of personality to your projects. Welcome spring with these adorable, quick-to-make crochet sweet spring amigurumi birds! With chenille yarn, they are incredibly soft and perfect as a plush toy or decor. This easy crochet pattern is fun for both kids and adults to make – whip up a whole flock in just one weekend! Great for easter baskets, adding a touch of cuteness to any room, or choosing your colors to show off the year round season. Get crafting today & create these sweet little birds! craftykittycrochet […]
Amigurumi Chicken / Rooster – Crochet Pattern Mod ~ Crafty Kitty Crochet
June 30, 2023 at 7:10 pm
[…] reminder! This is a pattern mod to my Sweet Spring Birds crochet pattern – so you’ll need to make that first in order to have a whole chicken or […]
7 Spring Bird Crochet Patterns – FREE – iGOODideas.com
February 6, 2024 at 8:07 pm
[…] 3. Click here to get this Spring Bird FREE PATTERN […]