
This post may contain affiliate links. If you use these links to buy something I may earn a small commission at no cost to you. Thanks.
…
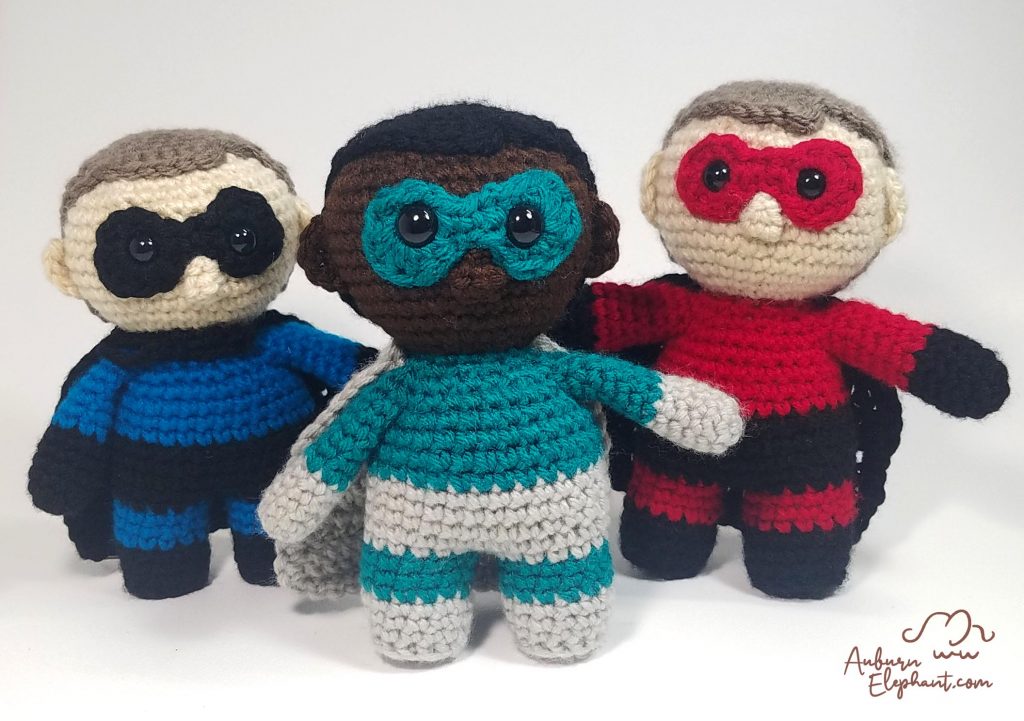
Wow, you would probably not believe how many different iterations of this little guy I’ve been through! I’ve made and remade this little doll so many times. But now I think I have it in a good place! It’s little and easy to construct and makes a GREAT last-minute gift! I’ve made several for birthday parties that I forgot about until the night before…
I also love how versatile it is. The features are pretty nondescript so you can put your own spin on it. I made my boys each their own Super Dolls. I’ve made the well-known hero versions too. All it takes is the right color changes and additional details. 😉
I’ve made these as Super Girls too! All it takes is a different hair cap (or long ties of yarn) and voila! I’ll write up an addition for the long hair soon too.
I hope you enjoy all that this Little Hero has to offer. Now go Save the Day!!!

A couple of disclaimers: This pattern is intended for personal use only. You are welcome to use the pattern to make and sell products, to keep for yourself, or to give away as gifts. I would appreciate receiving credit and a link back to the site, however. Please do not republish or distribute the pattern in any way, or use my photos in your listings.
I hope you enjoy this crochet pattern. If you have any questions or comments you can leave them below OR email me at auburnelephant@gmail.com OR through the contact page on this site. I’d also love to see your finished creations! 🙂
Don’t forget to add this pattern to your Ravelry Queue!
An Ad-free, printable PDF-version of this pattern is also available on Ravelry or ETSY!
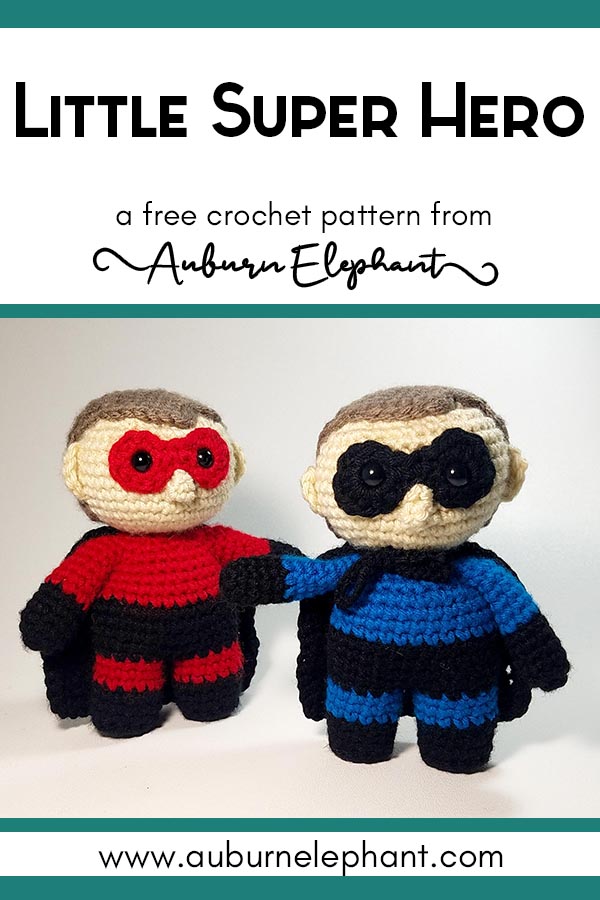
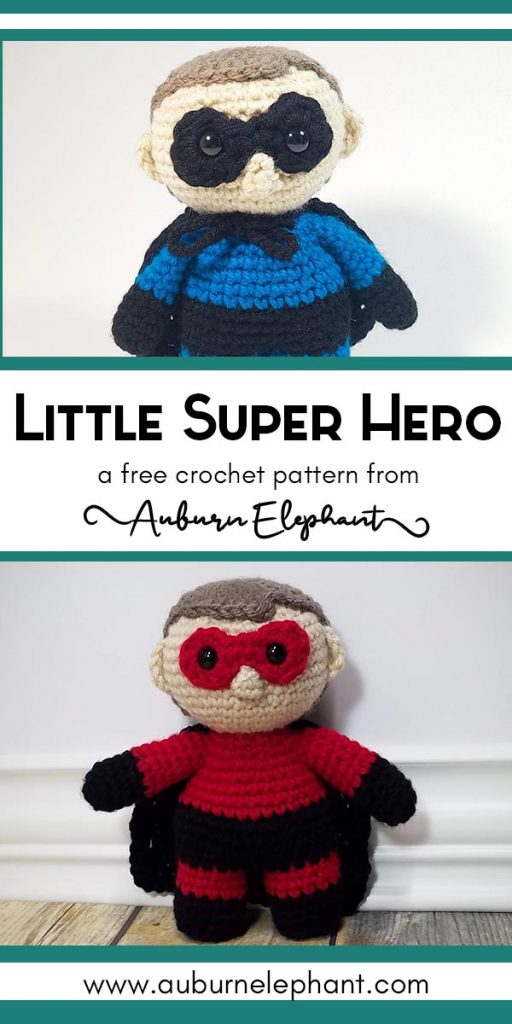
Little Super Hero
Supplies Needed:
- Big Twist Value Yarn, Medium Worsted Weight 4 (100% Acrylic, 380 yds, 6 oz) only 1 skein approx 40-50 yds each of Colors A and B- Suit Colors, Color C- Skin Tone, Color D- Hair Color
- G/6 4.25mm, or your preferred size for Amigurumi
- Safety Eyes, 8-10mm (2), shown using 9mm eyes
- Polyfil
- Needle
Stitches Used:
- SC- Single Crochet
- Ch- Chain
- Sl st- Slip Stitch
- BPSC- Back Post Single Crochet
- 2SC- Single Crochet Increase- 2 SC in same stitch to increase
- DEC- Single Crochet Decrease, Using the Invisible Decrease method, insert hook up through front loops of next 2 stitches, yarn over, pull through front loops, yarn over, pull through to finish decrease
- DC- Double Crochet
Notes:
- Pattern is worked in joined rounds. I use the joined rounds because it is easier to attach the arms and legs if the final round is flat and it keeps the sides even. I have a written and video tutorial if you need help with your joins.
- Each round will begin with a Ch 1 and end with a sl st to the first SC of the round.
- Beginning Ch 1 does NOT count as a stitch.
- For color changes, my suggestion is to do the final pull through of the last stitch with the new color and continue from there.
- Gauge for amigurumi isn’t terribly important but you want to make sure that your stitches are tight enough that stuffing will not show through. So choose a hook that works for your tension and with the yarn that you choose. (Thinner yarn would require a smaller hook, thicker yarn would require a larger hook.) As written, with specified supplies, finished size is approximately 7” tall.
- You will begin by making the arms and legs and then you will work them onto the body as you go.

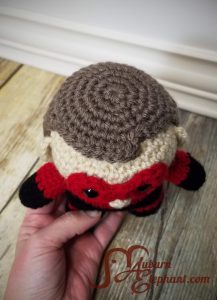
Mask
Make this early and then set aside, or make once you are ready to place your safety eyes. You can also leave the mask off entirely if you aren’t worried about your hero’s secret identity.
In Color A or B
1) Ch 4, join with a sl st to the first Ch. Ch 7, join with a sl st to the 4th Ch from the hook. (You should end with 2 loops and 3 chains in between.)
2) Ch 1, SC 3 across the chain, (SC, HDC 3, DC 2, HDC 3) into the loop, continuing onto the other side of the middle chain, sl st 3 across, (HDC 3, DC 2, HDC 3, SC) into the other loop. Sl st to the first SC.
Finish off. Use the starting tail to tighten up the ‘bridge’ part of the mask. Leave the other tail to sew into place.
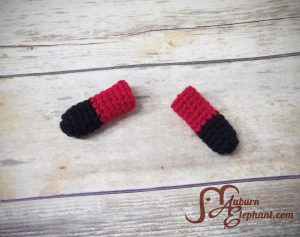
Arms
(Make 2)
In Color A
1) Using the Magic Ring technique (OR Ch 3 and join with a sl st to first ch to form a ring) SC 5 into ring. (5)
2) 2SC in each around. (10)
3-6) SC in each around. (10)
In Color B
7-12) SC in each around. (10)
Finish Off. Either weave in your ends or tuck it into the arm as stuffing.
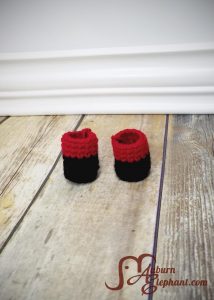
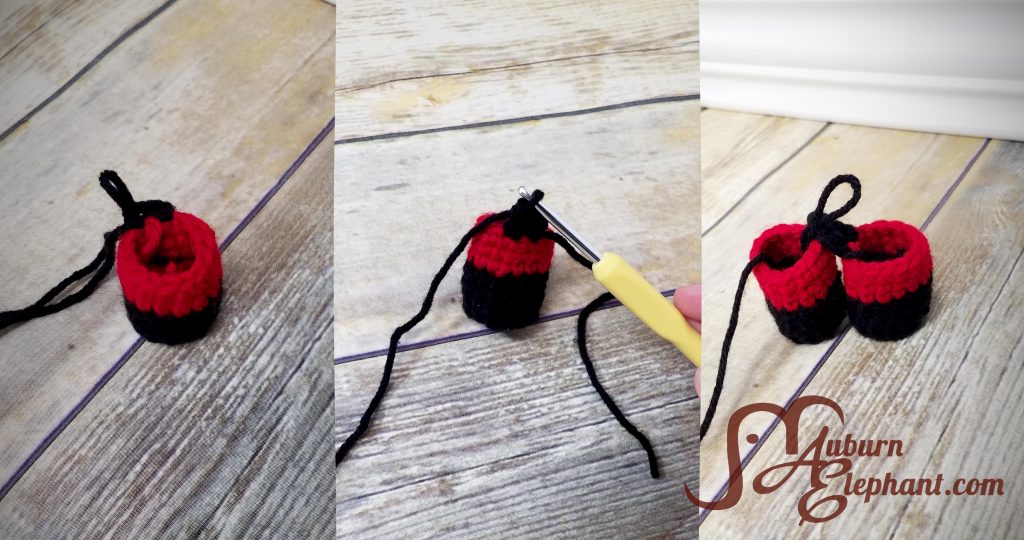
Legs
(Make 2)
In Color A
1) Using the Magic Ring technique (OR Ch 3 and join with a sl st to first ch to form a ring) SC 7 into ring. (7)
2) 2SC in each around. (14)
3) BPSC in each around. (14)
4-6) SC in each around. (14)
In Color B
7-9) SC in each around. (14)
Finish Off. Either weave in your ends or tuck it into the leg as stuffing.


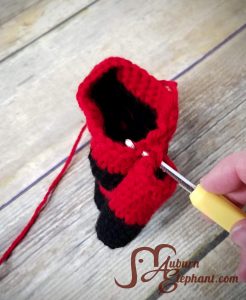
Body
In Color A
Reattach Color A to a Leg, Ch 1, SC in next 2 (leave rest unworked), Ch 1 and turn. SC 2. Ch 1 and turn. Sl st 2 to other Leg. (I usually sl st over the seam of the Legs so that the seams are on the inside.)
From there Ch 1 and begin Body Round 1.
1) SC in each stitch around. (28- 12 SC around each leg and 2 into both sides of the joining section)
2) SC in next 5, 2SC, SC in next 13, 2SC, SC in remaining 8. (30)
3-5) SC in each around. (30)
In Color B
6) SC in each around. (30)
7) SC in next 6, DEC, SC in next 13, DEC, SC in remaining 7. (28)
8) SC in each around. (28)
In the next round you’ll be attaching the arms. When you get to the arm section, you’re going to insert your hook through any stitch on the arm (I pick the ones on either side of the join seam) going from the wrong side to the right side and then into the next stitch on the body. You’ll yarn over and then pull through the body and arm to finish the sl st together. Do this for the next 2 stitches for a total of 3 sl st.
9) SC in next 6, sl st 3 through arms (over seam) and into body, SC in next 11, sl st 3 through arms (over seam) and into body, SC in remaining 5 (22 SC, 6 sl st worked this round. Next round goes around the arms [the sl st do not get worked again] so you will have 36 stitches to work for Round 10)
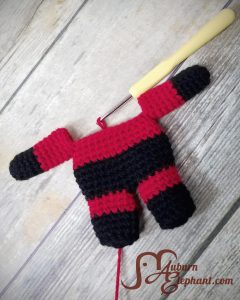
Your arms should line up with the sides of the body when pressed flat. Check that it does. If they do not line up evenly, redo Round 9 adjusting forward or backward by one stitch until even. Just keep 11 SC between each arm attachment. Carry your adjustment through the rest of the body section.
On the next round, watch out for the joining sl st going on and off of the arm. They can be tricky to see. If you watch the counts though you should be able to figure it out.
10) SC in next 4, DEC, then continue around onto the unworked arm stitches, SC in next 2, DEC, SC in next 3, DEC, SC in next 7, DEC, SC in next 3, DEC, SC in next 2, DEC, SC in last 3. (30)
11) *SC in next 2, DEC;* Repeat from * to * around. SC in last 2. (23)
12) *SC in next, DEC;* Repeat from * to * around. SC in last 2. (16)
13) SC in next 4, DEC, SC in next 6, DEC, SC in last 2. (14)
Stuff body. Make sure to get stuffing down to the bottom of the legs and arms. If you leave the arms slightly less stuffed toward the shoulder they will lie flatter, if you stuff them full they will likely stick out straight.
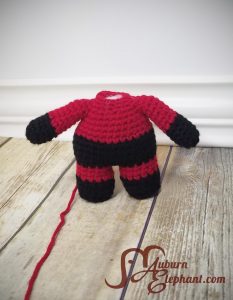
Next round starts the Head section.
In Color C
14) 2SC in each around. (28)
15) *SC in next 2, 2SC;* Repeat from * to * around. SC in last. (37)
16) SC in each around. (37)
17) *SC in next 11, 2SC;* Repeat from * to * around. SC in last. (40)
18- 24) SC in each around. (40)
25) *SC in next 2, DEC;* Repeat from * to * around. (30)
26) SC in each around. (30)
If you haven’t made your mask yet go ahead and do that. Then place the safety eyes through the openings in the mask and in between rounds 21 and 22 about 5 stitches apart. You can also embroider your eyes on after you’re finished if you prefer.

27) *SC in next, DEC;* Repeat from * to * around. (20)
Stuff the head fully. Make sure that the body is as firm as you’d like it and that the neck is filled.
28) DEC around. (10)
Finish off. Use tail to sew hole shut.

Ears
Make 2
Ch 5, SC in 2nd from hook, SC in next 2, sl st in last. Finish off.
Use pins to place the ears in line with each other, about 4 stitches away from the side of the mask directly above the shoulders. Use the tails to attach and shape the ears as well.
Nose
Leaving a decent starting tail, Ch 2,
1) SC in 2nd from hook. Ch 1, turn.
2) 2SC in stitch. Ch 1, turn.
3) SC in each across.
Leave a long tail to attach. Using the tails, you will attach and shape the nose to fit in the bridge section of the mask.
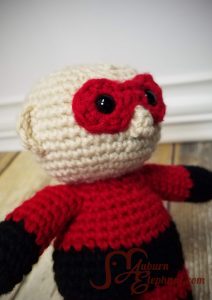
Now you can add on any other facial features that you like, a mouth, eyelashes, freckles, whatever your hero needs. I suggest doing these details before adding your hair so that you can hide ends if needed.
You can also add other details that will make this Super Hero look like any of the big names as well! 🙂
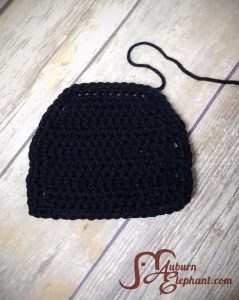
Hair
You have some options when it comes to the hair. You can leave your hero bald and call it done. You can tie on yarn and give your hero some length and volume. You can embroider the hair on by taking yarn on a needle and stitching through the scalp. You can crochet a hair cap, like the pattern below, and sew that on. I struggle with which way I like the most. I think the caps are more difficult to get the shaping right but take far less time than ties or embroidery. So you can choose. Changing the hair gives this hero a completely different look too so you can get creative!
1) Using the Magic Ring technique (OR Ch 3 and join with a sl st to first ch to form a ring) SC 8 into ring. (8)
2) 2SC in each around. (16)
3) *SC in next, 2SC;* Repeat from * to * around. (24)
4) *SC in next 2, 2SC;* Repeat from * to * around. (32)
5) SC in each around, do NOT join. (32)
6) Ch 1, turn. SC in next 28. Leave remaining 4 stitches unworked.
7) Ch 1, turn. SC in next 20. Leave remaining 8 stitches unworked.
8) Ch 1, turn, SC across.
9) Ch 1, turn, DEC, SC in next 16, DEC.
10-16) Ch 1, turn. SC across. (18)
17) Ch 1, turn. SC 17 across, 2SC in last, continue SC along the edge, sl st the front part of the cap and along the hair’s part. When you get across continue SC down the other edge, SC in the same as starting and join with a sl st to first.
Finish off. Leave long tail to sew on the hair to the scalp.
Cape
In Color A or B
This piece is worked in rows. At the end of each Row, Ch 2 and turn.
Leave a long starting tail to attach to neck.
Ch 12,
1) Starting in 2nd from hook, SC in each chain. (11)
2-4) 2DC in first, DC in each across, 2DC in last.
5-8) DC in each across. (17)
SC around the edges for the border. Finish off and weave in end.
Use the starting tail to attach to neck of the doll. Or you can chain lengths off of both sides of the top to tie it on instead of sewing it.
There you go! You have your very own Super Hero!!
Watch it come together below…

So kawaii!!!! 😀