
I’m kicking off this year’s Halloween Crochet Along with CAL Central Crochet with the Silly Monster Beanie in five sizes. This monster crochet hat pattern is not scary at all, so it’s perfect for kids of all ages. Read on for the pattern and details on how you can join the CAL!
This post contains affiliate links. I may receive compensation (at no added cost to you) if you make a purchase using these links. I’m a King Cole Brand Ambassador and this post is part of our ongoing collaboration. Additional materials for this project were generously provided by Clover USA and Nelsonwood.
I don’t know about you, but 2020 has been a bit challenging for me. When I was trying to decide on my pattern for this year’s Halloween Crochet Along, I knew that I wanted to make something lighthearted.

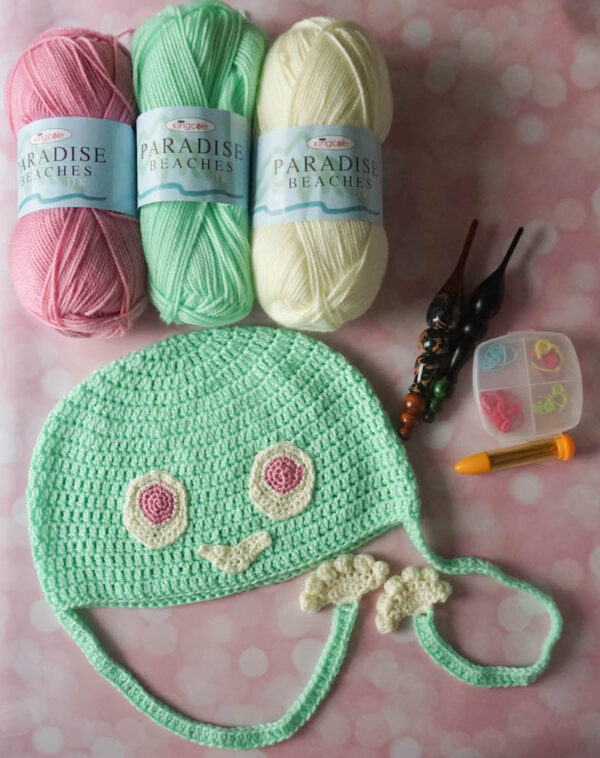
I picked these pretty pastels in King Cole Paradise Beaches DK yarn. If your local yarn shop doesn’t stock it, you can find Paradise Beaches DK online at LoveCrafts or Wool Warehouse UK. It’s a very soft light weight (#3) acrylic blend that’s perfect for a cozy hat. The colors kept me happy the whole time I was crocheting!
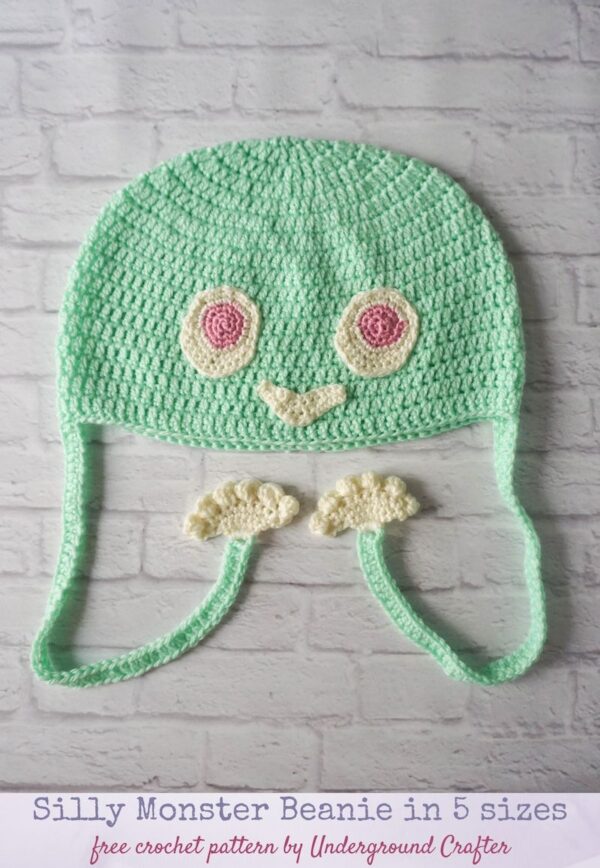
The pattern is available in five sizes from newborn through adult large. This pattern uses two hook sizes, but the large size is the one that’s important to use when checking your gauge since that’s the one the beanie itself is crocheted with. I used a smaller hook size for the Eyes and Smile so that the beanie yarn color wouldn’t show through when I seamed them to the hat.
This is the first pattern in the 2020 second annual Halloween Crochet Along with CAL Central. Join in with us!
- Learn more about the CAL and enter for your chance to win the end-of-CAL giveaways prizes from Nelsonwood, King Cole, and Search Press North America by 11:59 p.m. Eastern on Sunday, September 20, 2020) in this blog post.
- You can join in by crocheting the patterns as you have time.
- Share your progress and post pictures of your finished projects. Tag your projects and posts #CALCentralCrochet and #HalloweenCAL2020 on all social media.
- If you’d like to chat with other crocheters, join the CAL Central Crochet Facebook group, or visit this thread in the CAL Central Ravelry group.
- By the end of the CAL, you’ll have up to 10 spooky Halloween projects.
- Use this button below on your Ravelry project pages or elsewhere on social media. Right click (on desktop) or tap and hold (on mobile) to save.

If you make your own Silly Monster Beanie, I’d love to see it! Share your progress and questions by tagging me on Facebook as @Underground Crafter, Instragram as @ucrafter, or Twitter as @ucrafter. You can also share a picture in the Underground Crafters Facebook group. Sign up for my weekly newsletter and get a coupon code for your choice of one of my premium patterns and other subscriber goodies. Plus, you’ll never miss one of my free patterns again!
Add the Silly Monster Beanie to your favorites or queue, or buy the ad-free PDF on Ravelry.


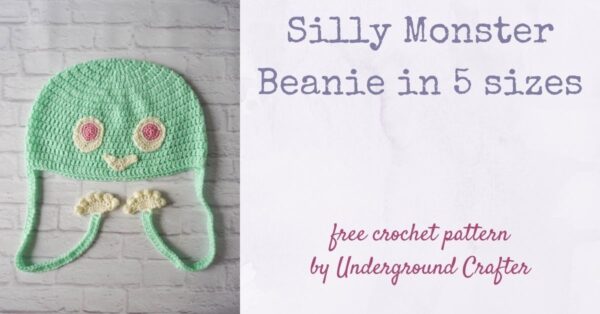
Silly Monster Beanie in 5 Sizes
Monster Crochet Hat Pattern by Underground Crafter


This playful monster adds a bit of handmade fun to a basic beanie pattern in light weight yarn. This pattern is part of the second annual Halloween Crochet Along with CAL Central.
Finished Sizes
- Newborn (Infant/Toddler, Child, Teen/Adult, Adult Large). Photographed sample is Teen/Adult.
- Newborn: 12.5” (32 cm) hat circumference x 5” (13 cm) length.
- Infant/Toddler: 16” (40.5 cm) hat circumference x 6.75” (17 cm) length.
- Child: 19” (48.5 cm) hat circumference x 7” (18 cm) length.
- Teen/Adult: 22” (56 cm) hat circumference x 7.5” (19 cm) length.
- Adult Large: 26” (66 cm) hat circumference x 8.5” (21.5cm) length.
Materials
- King Cole Paradise Beaches DK yarn (70% acrylic/30% polyamide, 3.5 oz/100 g, 278 yd/255 m) – 1 skein each in 3006 Electric Lemonade (CA), 3002 White Russian (CB), and 3008 Strawberry Daquiri (CC), or approximately 60 yd (100 yd, 120 yd, 150 yd, 200 yd)/55 m (91.5 m, 110 m, 137 m, 183 m) in CA, 15 yd (14 m) CB, and 6 yd (5.5 m) CC in any light weight acrylic or acrylic blend yarn.
- Nelsonwood Walnut Shell US Size G-6/4 mm crochet hook, or any size needed to obtain correct gauge.
- Nelsonwood Black Cat US Size F-5/3.75 mm crochet hook, or any size needed to obtain correct gauge.
- Clover Quick Locking Stitch Marker set.
- Clover Chibi yarn needle.
Gauge
- Through Rnd 4 with larger hook in pattern = 4” (10 cm) diameter. For best fit, always check your gauge. Gauge for pieces crocheted with smaller hook is not critical.
Abbreviations Used in This Pattern
- bob – 5-repeat bobble – [Yo, insert hook in st, yo and draw up a loop, yo and draw through 2 loops] 5 times in same st, yo and draw through all 6 loops on hook. A helpful video tutorial for this stitch is available here.
- CA – Color A
- CB – Color B
- CC – Color C
- ch – chain
- dc – double crochet
- hdc – half double crochet
- rep – repeat
- Rnd(s) – Round(s)
- RS – right (front) side
- sc – single crochet
- sl st – slip stitch
- sp – space
- st(s) – stitch(es)
- yo – yarn over
- *Repeat instructions after asterisk as indicated.
- () Repeat instructions between parentheses into same stitch or space.
- [] Repeat instructions between brackets as indicated
Pattern Notes
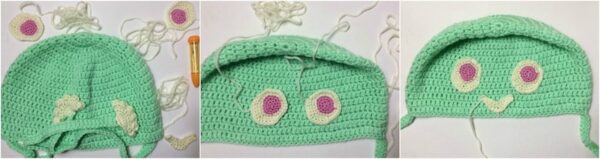
- Beanie is crocheted in one piece from crown to brim in the round with Monster Arms crocheted in the final Round. Monster Hands are joined to Monster Arms. Eyes are crocheted in a combination of Rounds and Rows and are sewn onto the Beanie. Smile is crocheted flat in Rows and sewn onto the Beanie.
- Inner Eyes are crocheted in the round in unjoined spirals. Place stitch marker in last st of Rnd and move up each Rnd to mark position.
- When choosing colors, note that CA is the Beanie and Monster Arms color. CB is the Monster Hands, Outer Eye, and Smile color. CC is the Inner Eye (Iris) color.
- Ch 1 at beginning of Rounds does not count as a stitch. Sl st at end of Rounds does not count as a stitch.
- Oombawka Design has a helpful magic adjustable ring tutorial here.
Pattern Instructions
Beanie – All Sizes
- Starting at crown with larger hook and CA, ch 4, skip 3 ch, join with sl st to next ch to form ring.
- Rnd 1: (RS) Ch 1, 12 dc in ring, join with sl st to first dc. (12 sts)
- Rnd 2: (RS) Ch 1, 2 dc in same st and in each st around, join with sl st to first dc. (24 sts)
- Rnd 3: (RS) Ch 1, starting in same st *2 dc in next st, dc in next st; rep from * around, join with sl st to first dc. (36 sts)
- Rnd 4: (RS) Ch 1, starting in same st *2 dc in next st, dc in next 2 sts; rep from * around, join with sl st to first dc. (48 sts) NEWBORN SIZE ONLY: CONTINUE ON TO INSTRUCTIONS FOR WORKING EVEN.
- Rnd 5: (RS) Ch 1, starting in same st *2 dc in next st, dc in next 3 sts; rep from * around, join with sl st to first dc. (60 sts) INFANT/TODDLER SIZE ONLY: CONTINUE ON TO INSTRUCTIONS FOR WORKING EVEN.
- Rnd 6: (RS) Ch 1, starting in same st *2 dc in next st, dc in next 4 sts; rep from * around, join with sl st to first dc. (72 sts) CHILD SIZE ONLY: CONTINUE ON TO INSTRUCTIONS FOR WORKING EVEN.
- Rnd 7: (RS) Ch 1, starting in same st *2 dc in next st, dc in next 5 sts; rep from * around, join with sl st to first dc. (84 sts) TEEN/ADULT SIZE ONLY: CONTINUE ON TO INSTRUCTIONS FOR WORKING EVEN.
- Rnd 8: (RS) Ch 1, starting in same st *2 dc in next st, dc in next 6 sts; rep from * around, join with sl st to first dc. (96 sts) ADULT LARGE SIZE ONLY: CONTINUE ON TO INSTRUCTIONS FOR WORKING EVEN.
Working Even – All Sizes
- Working Even Rnd 1: (RS) Ch 1, dc in same st and in each st around, join with sl st to first dc. – 48 (60, 72, 84, 96) sts
- Rep Working Even Rnd 1 until Beanie measures approximately 4.75” (6.5”, 6.75”, 7.25”, 8.25”)/12 cm (16.5 cm, 17 cm, 18.5 cm, 21 cm), or approximately .25” (.5 cm) shorter than desired finished length.
Monster Arms – All Sizes
- Final Rnd: (RS) Ch 1, sc in first 12 (15, 18, 21, 24) sts, *ch 12 (12, 27, 52, 52), turn to work into ch, skip 3 ch (counts as dc/ch-3 sp), dc in next 9 (9, 24, 49, 49) ch to form Arm, sc in next st on Beanie,** sc in next 23 (29, 35, 41, 47) sts, rep from * to ** once, sc in next 11 (14, 17, 20, 23) sts, join with sl st to first sc. Fasten off. – 48 (60, 72, 84, 96) sts + 2 Monster Arms with 10 (10, 25, 50, 50) sts each
Monster Hands – Newborn, Infant/Toddler, and Child Sizes ONLY
- With larger hook and RS facing, join CB with sl st to ch-3 sp at end of first Monster Arm.
- Row 1: (RS) Ch 1, 5 sc in ch-3 sp. (5 sts)
- Row 2: Turn, ch 1, 2 sc in first st, sc in next 3 sts, 2 sc in last st. (7 sts)
- Row 3: (RS) Turn, ch 1, 2 sc in first st, sc in next 5 sts, 2 sc in last st. (9 sts)
- Row 4: Turn, ch 1, sc in first st, [bob in next st, sc in next st] 4 times. Fasten off. (9 sts)
- Rep on second Monster Arm.
Monster Hands – Teen/Adult and Adult Large Sizes ONLY
- With larger hook and RS facing, join CB with sl st to ch-3 sp at end of first Monster Arm.
- Row 1: (RS) Ch 1, 5 sc in ch-3 sp. (5 sts)
- Row 2: Turn, ch 1, 2 sc in first st, sc in next 3 sts, 2 sc in last st. (7 sts)
- Row 3: (RS) Turn, ch 1, 2 sc in first st, sc in next 5 sts, 2 sc in last st. (9 sts)
- Row 4: Turn, ch 1, 2 sc in first st, sc in next 7 sts, 2 sc in last st. (11 sts)
- Row 5: (RS) Turn, ch 1, 2 sc in first st, sc in next 9 sts, 2 sc in last st. (13 sts)
- Row 6: Turn, ch 1, sc in first st, [bob in next st, sc in next st] 6 times. Fasten off. (13 sts)
- Rep on second Monster Arm.
Eyes – All Sizes – Make 2
- Starting at the Inner Eye (Iris) with smaller hook and CC, form magic adjustable ring (see Pattern Notes).
- Rnd 1: (RS) Ch 1, 6 sc in ring, place stitch marker in last st to mark position (see Pattern Notes), tighten ring to close.
- Rnd 2: (RS) 2 sc in each st around. (12 sts)
- Rnd 3: (RS) *2 sc in next st, sc in next st; rep from * around, join with sl st to next st. Fasten off CC. (18 sts)
- Rnd 4: (RS) With smaller hook, join CB with sl st to any st on Rnd 3, ch 1, starting in same st *2 sc in next st, sc in next 2 sts; rep from * around. (24 sts) NEWBORN, INFANT/TODDLER, AND CHILD SIZES ONLY: FASTEN OFF AND CONTINUE ON TO INSTRUCTIONS FOR SMILE.
- Rnd 5: (RS) [2 sc in next st, sc in next 5 sts] twice, sl st to next st, skip next 14 sts. (10 sts)
Begin working in Rows
- Row 6: Turn, sc in next 4 sts, 2 sc in next st, sc in next 5 sts, join with sl st to next st on Rnd 4. (11 sts)
- Row 7: (RS) Turn, sc in next 5 sts, 2 sc in next st, sc in next 5 sts. (12 sts)
Return to crocheting in the Round
- Rnd 8: (RS) Do not turn, sc in side of each of next 2 rows, continue working on unworked sts from Rnd 4, sc in next 2 sts, [2 sc in next st, sc in next 3 sts] 3 times, sc in side of next 2 rows. Fasten off with long yarn tail for seaming (approximately 12”/30.5 cm). (32 sts)
Smile – All Sizes
- With smaller hook and CB, ch 13.
- Row 1: Turn, skip first ch, sc in next 12 ch. (12 sts)
- Row 2: Turn, ch 1, sl st in first 4 sts, sc in next st, 2 hdc in each of next 2 sts, sc in next st, sl st in next 4 sts. (14 sts)
- Row 3: Turn, ch 1, sl st in first 4 sts, sc in next 2 sts, 2 hdc in each of next 2 sts, sc in next 2 sts, sl st in next 4 sts. Fasten off with long yarn tail for seaming (approximately 12”/30.5 cm). (16 sts)
Assembly and Finishing
- With yarn needle, weave in yarn tails at beginning and end of Beanie, Monster Arms, and Monster Hands. Weave in yarn tails at beginning of Eyes and Smile.
- Thread yarn needle with tail from first Eye. Position Eyes on front of Beanie.
- When satisfied with position, pin Eyes to Beanie using locking stitch markers. With yarn needle, sew first Eye to Beanie (being careful to only sew on front of Beanie and not through both layers). Check position of second Eye then sew to Beanie using yarn tail. Weave in ends on inside of Beanie.
- Position Smile on Beanie. When satisfied with position, pin Smile to Beanie using locking stitch markers. With yarn needle, sew Smile to Beanie (being careful to only sew on front of Beanie and not through both layers).
- With yarn needle, weave in ends on inside of Beanie.
- (Optional) Spray block if necessary.