
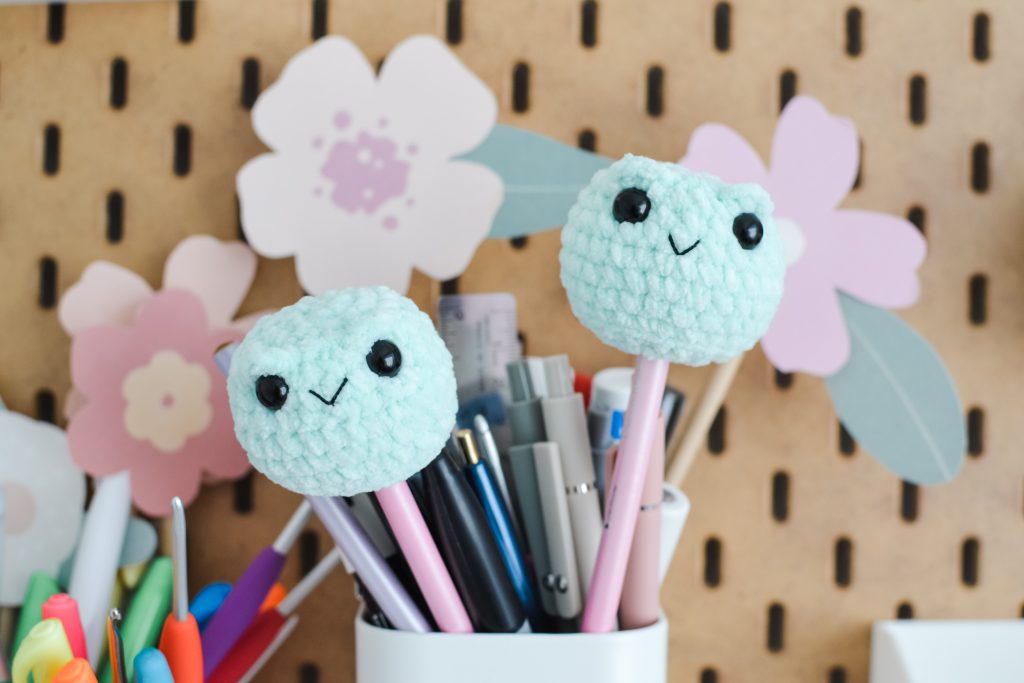
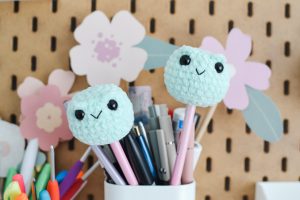
Frog Pencil Topper
Free Amigurumi Crochet Pattern
Perched proudly on your pencil, this cheerful frog pencil topper is ready to ribbit, write, and rule your stationery collection.
Skill Level: Advanced Beginner
This no-sew crochet pattern is written in U.S. crochet terms, complete with clear instructions, pictures, and video tutorial to help you along the way. Frog Pencil Topper is crocheted in the round/continuous spirals without joining the rounds. I suggest using a stitch marker or different color yarn to keep track of each round. Frog Pencil Topper is crocheted in worsted weight yarn and is approximately 1.5 inches tall. Be aware that size may vary depending on the yarn and hook size used. Gauge is not particularly important, just be consistent with the tension you are using. And most importantly, have fun!
Jump To The Free Pattern BelowFree Pattern
Video Tutorial
Birthday
September 1, 2025
Likes
Cozy Pencil Cases and Green Markers
Dislikes
Loud Zippers and Math
Need Help?
This pattern is free but it is still copyrighted
This crochet pattern, as well as all images and text contained herein are copyrighted by YarnSociety.com and should not be copied, emailed, sold, reproduced, or distributed in any way to any other person or entity, or posted on any website (links to this page are welcome). You may, however, sell the final product or products created from this crochet pattern in accordance with your state and local laws, with the exception of mass production.

Frog Pencil Topper Pattern Essentials
Supplies
- Worsted Weight (4) Weight Yarn
- Skinny Chenille By Loops & Threads (~23 yards/11 grams) (feel free to use any worsted)
- Long piece of Black Embroidery floss
- D (3.25mm) crochet hook
- Two 9mm plastic safety eyes (Not recommended for children under 3 years old)
- Embroidery needle
- Yarn/Darning needle
- Scissors
- Polyfil Stuffing
- Pencil (optional)
- Locking Stitch Markers (optional)
*These are affiliate links to supplies I personally use and love. Thank you for supporting Yarn Society.
Techniques
Abbreviations
- sc – single crochet
- st/sts – stitch(es)
- inc – increase (add 2 single crochet stitches into a stitch)
- dec – decrease (join 2 single crochet stitches into 1)
- ch – chain
- R1- round 1
- ( ) – repeat this group of stitches
- flo- front loop only
- blo- back loop only
Frog Pencil Topper Pattern Example
If a line is written with a single “inc”, “dec” or “sc” – make one single crochet increase, decrease, or single crochet into one stitch only.
6 sc into a Magic Circle{6 sts}
R1 starts with a magic circle
Alternate way to begin: chain 2, sc 6 times in 2nd chain from hook {6 sts}
(inc, sc) 6 times {18 sts}
(2 single crochets in one stitch, then single crochet in the next stitch) – repeat that sequence a total of 6 times for a total of 18 stitches
(dec, sc in next 2 sts) 6 times {18 sts}
(join 2 single crochets into 1, and then single crochet in next 2 stitches) – repeat that sequence a total of 6 times for a total of 18 stitches
Right Hand Frog Pencil Topper Crochet Along Video Tutorial
Left Hand Frog Pencil Topper Crochet Along Video Tutorial
Full Free Pattern Below↓
Frog Pencil Topper Full Pattern
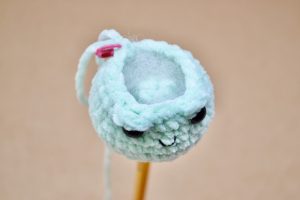
HEAD
-
Using color of choice
Right and left hand video tutorials available for this pattern in the pattern example above. Watch the step-by-step video
-
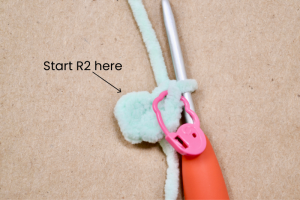
R1: 6 sc into a magic circle {6 sts}
Watch the step-by-step video tutorial for 3 options for completing R2-R6.
-
For this pattern you have a few options on how to complete R2-R6. Option 1 is to crochet with the wrong side facing you - our work will automatically turn to the wrong side since we're not increasing. You know you have the wrong side when you can see the tail from the magic circle.
-
The 2nd option is to turn your work inside out at R4 and continue crocheting the next two rounds. You can use a pencil or back of crochet hook to do this. The 3rd option is to crochet R2-6 and then flip the piece inside out. R1-R6 is considered the post for the pencil.
-
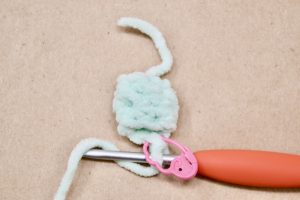
R2-6: sc in next 6 sts {6 sts}
-
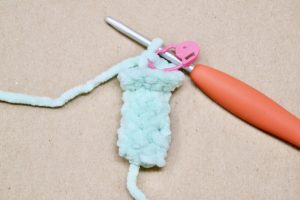
R7: (inc) 6 times {12 sts}
-
R8: (inc, sc) 6 times {18 sts}
-
R9: (inc, sc in next 2 sts) 6 times {24 sts}
-
-
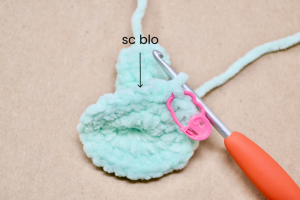
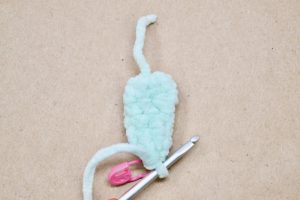
R10: sc blo in next 24 sts {24 sts}
-
R11: sc in next 24 sts {24 sts}
-
R12: (inc, sc in next 3 sts) 6 times {30 sts}
-
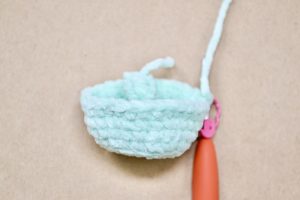
R13: sc in next 30 sts {30 sts}
-
R14: (dec, sc in next 3 sts) 6 times {24 sts}
-
R15: sc in next 24 sts {24 sts}
Watch the step-by-step video tutorial for the marking eye stitches.
-
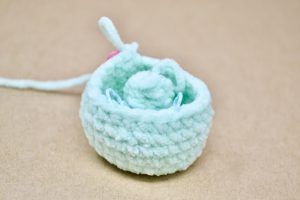
R16 we’re making the eyes. Mark the back loops only of stitch 11 and stitch 16. All eye stitches will be worked into the front loop of the marked stitch. Optional: I suggest marking the first and last sc of each eye as it’s helpful for R17.
-
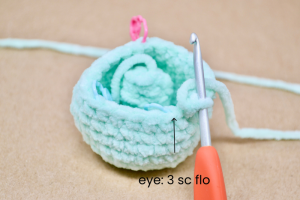
R16: sc in next 10 sts, [eye: 3 flo sc in the same stitch], sc in next 4 sts, [eye: 3 flo sc in the same stitch], sc in next 8 sts {24 sts} counting the marked back loops, not the flo stitches of the eyes.
-
-
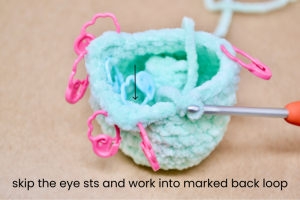
For R17: We’ll work into the back loops that we marked for R16 and not into the marked stitches of the eye. After you work into the marked back loop, reach your hook over into the next stitch - the one next to your marked eye stitch.
-
R17: (dec, sc in next 2 sts) 2 times, dec, sc into marked back loop st, sc next st, dec, sc next st, sc into marked back loop st, (dec, sc in next 2 sts) 2 times {18 sts}
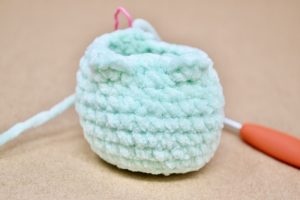
Watch the step-by-step video tutorial for safety eyes, smile, and stuffing.
-
We’re going to pause and place the safety eyes and smile. Place 9mm safety eyes between R15 and R16 leaving 4 stitches open between the eyes. Secure safety eyes when happy with placement. With pink or black thread/floss, embroider a smile.
-
Place your frog on a pen or pencil for support and then lightly stuff around the middle post. Continue to lightly stuff as you continue crocheting.
-
R18: (dec, sc) 6 times {12 sts}
-
R19: (dec) 6 times {6 sts}
-

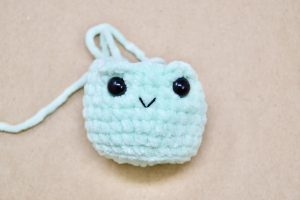
Fasten off and leave a long piece of yarn to sew the head shut. Cut off excess yarn.
-
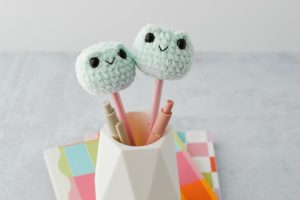
Place your topper on a pen, pencil or crochet hook.
-
-
Gift a topper to a friend.
-
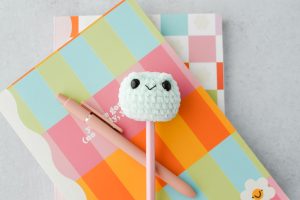
Grab your favorite notebook and jot some notes.
-

If you like Frog Pencil Topper, make sure to check out my Frog Desk Buddy Free Crochet Pattern.