-
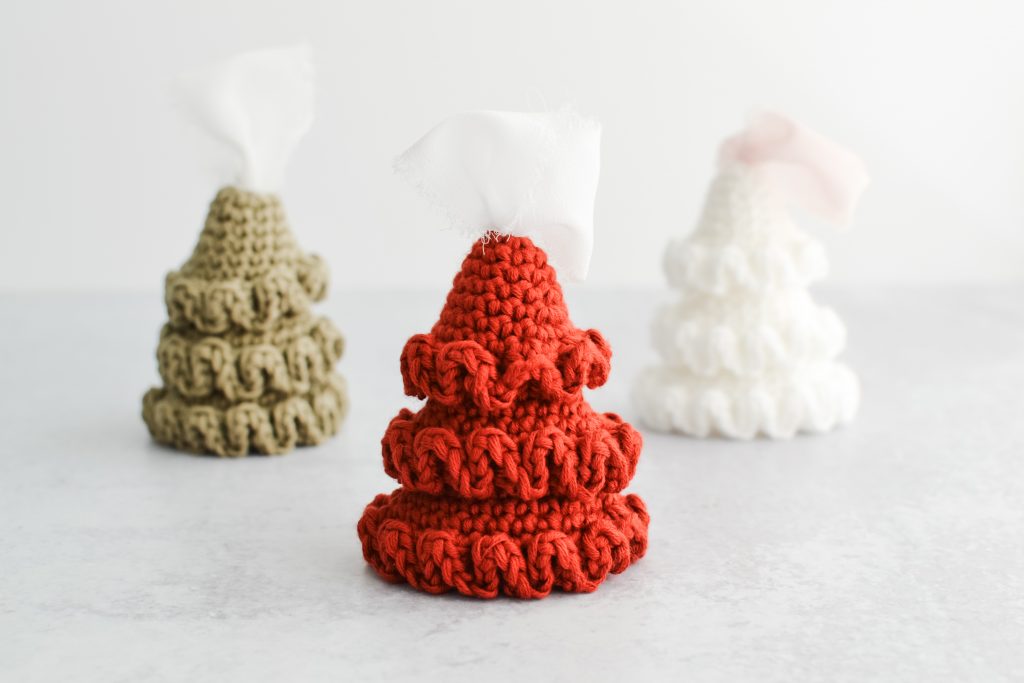
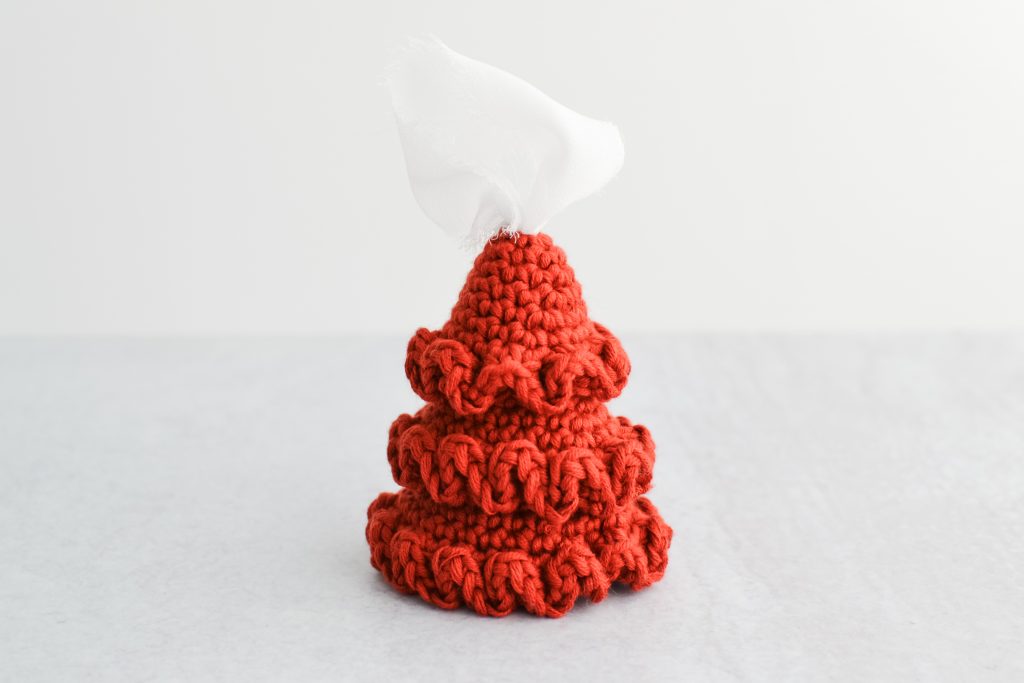
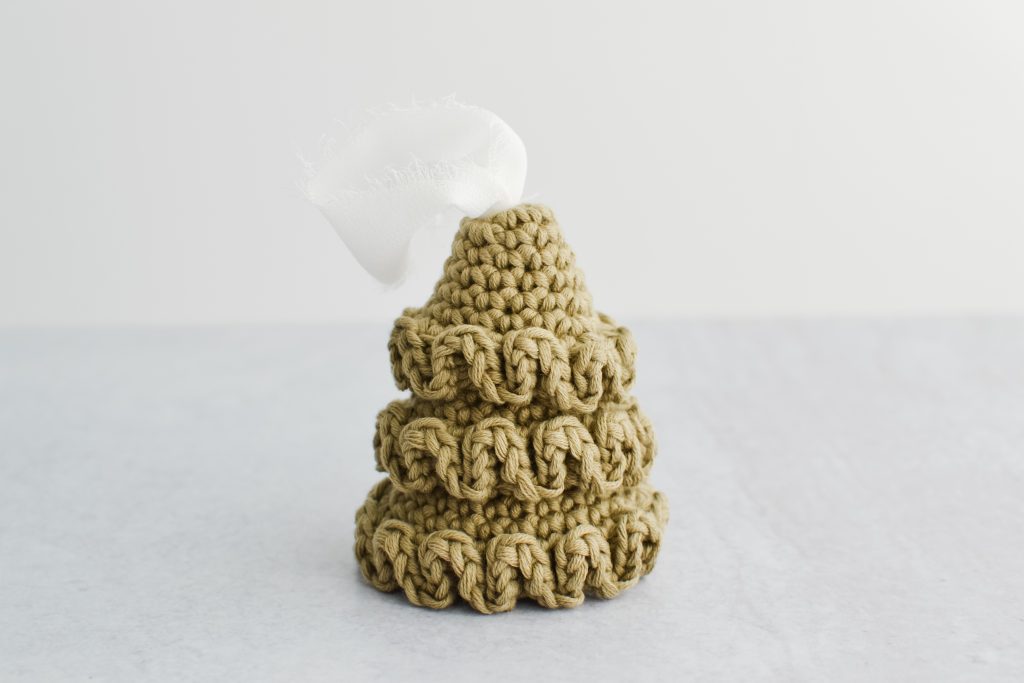
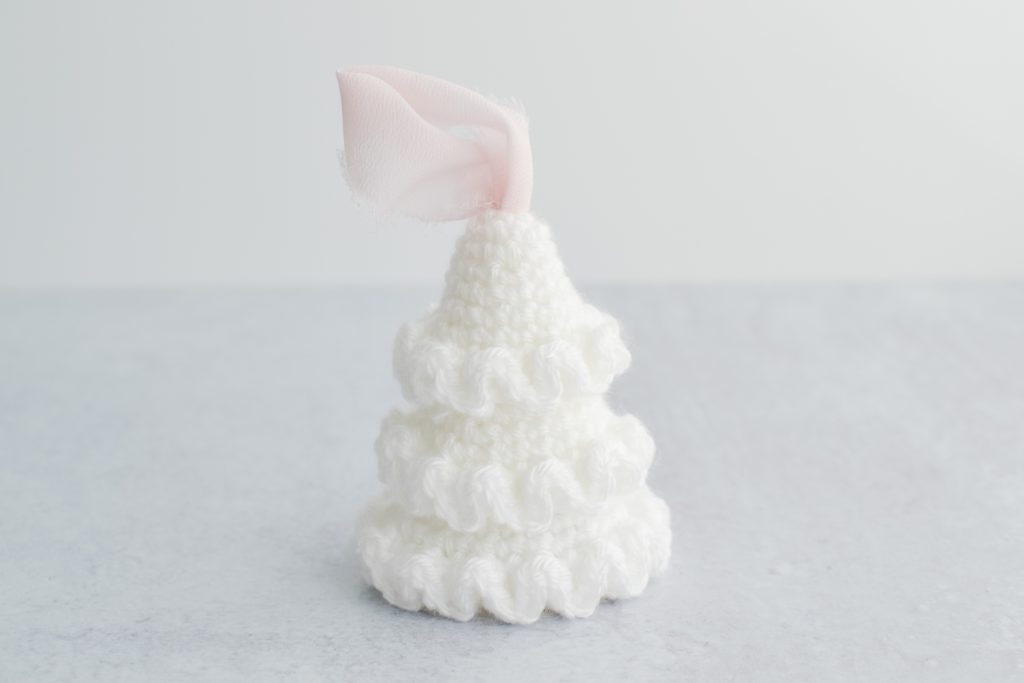
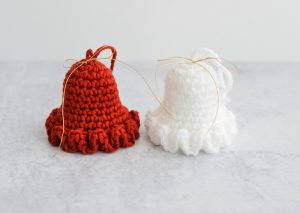
Ruffle Tree Ornament
Free Amigurumi Crochet Pattern
Buy This
Interested in buying the finished Ruffle Tree Ornament online? Click Here
Enter your email address
We'll notify you when Ruffle Tree Ornament is available for sale.
Sell This
Are you selling the finished Ruffle Tree Ornament online? Click Here
Enter your email address
We'll contact you about linking to your store.
Ruffle Tree Ornament
The Ruffle Tree Ornament adds a touch of elegance and whimsy to your holiday decor. Perfect for hanging on your Christmas tree or giving as a thoughtful handmade gift, this ornament adds a festive flair to the season!
Skill Level: Advanced Beginner
The pattern is written in U.S. crochet terms, complete with clear instructions and video tutorial to help you along the way. Ruffle Tree is crocheted in continuous spirals without joining the rounds. I suggest using a stitch marker or different color yarn to keep track of each round. Ruffle Tree is crocheted in worsted weight yarn and is approximately 3 inches tall. Be aware that size may vary depending on the yarn and hook size used. Gauge is not particularly important, just be consistent with the tension you are using. And most importantly, have fun!
View Full Free Pattern BelowVideo Tutorial
Need Help?
This pattern is free but it is still copyrighted
This crochet pattern, as well as all images and text contained herein are copyrighted by YarnSociety.com and should not be copied, emailed, sold, reproduced, or distributed in any way to any other person or entity, or posted on any website (links to this page are welcome). You may, however, sell the final product or products created from this crochet pattern in accordance with your state and local laws, with the exception of mass production.
Ruffle Tree Ornament Pattern Essentials
Supplies
- Worsted Weight Yarn
- We Are Knitters Cotton (cream) (~19 yards/44 grams)
- E/4 (3.50mm) crochet hook
- Yarn/Darning needle
- Scissors
- Locking Stitch Markers (optional)
- Chiffon Ribbon 1 inch wide (optional)
- Fabric glue (optional)
*These are affiliate links to supplies I personally use and love. Thank you for supporting Yarn Society.
Abbreviations
- sc – single crochet
- st/sts – stitch(es)
- inc – increase (add 2 stitches into a stitch)
- hdc – half double crochet
- R1- round 1
- ( ) – repeat this group of stitches
Ruffle Tree Ornament Pattern Example
6 sc into a Magic Circle {6 sts}
R1 starts with 6 single crochet in a magic circle
Alternate way to begin: chain 2, sc 6 times in 2nd chain from hook {6 sts}
(inc, sc) 6 times {18 sts}
(2 single crochets into a stitch, then single crochet in the next stitch) – repeat that sequence a total of 6 times for a total of 18 stitches
You can make this pattern as a tabletop decoration by using 5 Bulky weight yarn, I used Bernat Velvet and an H hook. (I do not recommend any bulkier weight yarn for this pattern)
We will work a wiggle stitch over the hdc post stitches. The wiggle stitch consists of single crochet stitches. Your stitches will go from top to bottom back to top by rotating your work as you crochet. Please watch the video for instruction.
Right Hand Ruffle Tree Video Tutorial
Left Hand Ruffle Tree Video Tutorial
Free Pattern Below↓
Get Notified Of New Free Patterns
Ruffle Tree Ornament Full Pattern
TOP LAYER (SMALL)
-
Using Color of choice
Right and left hand video tutorials available for this pattern in the pattern example above. Watch the step-by-step video
-
R1: 6 sc into a magic circle {6 sts}
Leave some room in your magic circle for your ornament hanger of choice. Tighten the magic circle just a bit. Watch the step-by-step video tutorial for R1
-
R2: (inc, sc in next 2 sts) 2 times {8 sts}
-
R3: (inc, sc in next 3 sts) 2 times {10 sts}
-
R4: (inc, sc in next 4 sts) 2 times {12 sts}
-
R5: (inc, sc in next 5 sts) 2 times {14 sts}
-
R6: (inc, sc in next 6 sts) 2 times {16 sts}
-
R7: (inc, sc in next 7 sts) 2 times {18 sts}
-
-
R8: hdc in next 18 sts {18 sts}
-
There is a R9 for right hand crocheters and a separate one for left hand crocheters. For R9 we will work a wiggle stitch over the hdc post stitches. You will be rotating your work back and forth. Your stitches will go from top to bottom to top.
Watch the right hand video tutorial or watch the left hand video tutorial
-
Right hand R9: (with the edge to the right, 3 sc under the next hdc post, with the edge facing up, sc at the bottom of the ch space, with the edge to the left, 3 sc under the next hdc post, with the edge facing up, sc at the top of the ch space) 9 times {72 sts} (you will have 9 wiggle stitches at the end)
Your last stitch will be a sc at the top of the chain.
-
Left hand R9: (with the edge to the left, 3 sc under the next hdc post, with the edge facing up, sc at the bottom of the ch space, with the edge to the right, 3 sc under the next hdc post, with the edge facing up, sc at the top of the ch space) 9 times {72 sts} (you will have 9 wiggle stitches at the end)
Your last stitch will be a sc at the top of the chain.
-

Fasten off and leave a tail. Weave in your end piece.
-
If you like Ruffle Tree Ornament, make sure to check out my Holiday Bell Ornament Free Crochet Pattern.