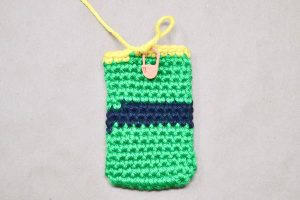
Holiday Gift Card Holder
Free Amigurumi Crochet Pattern
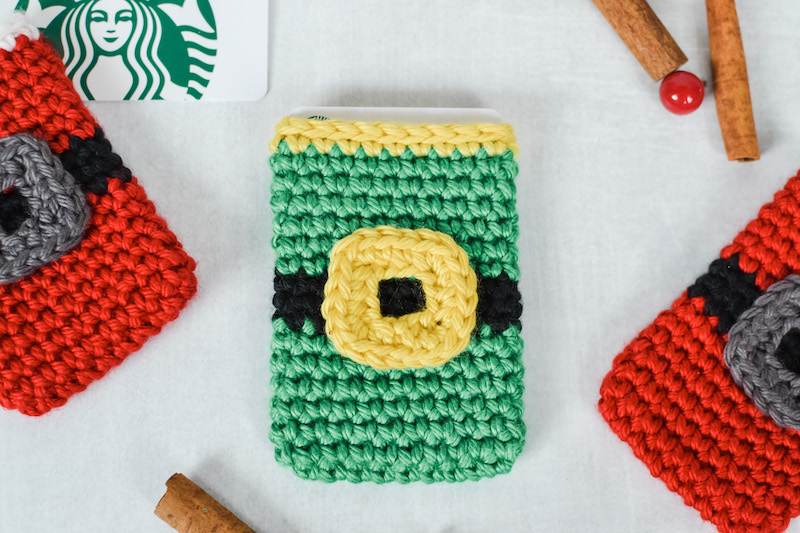
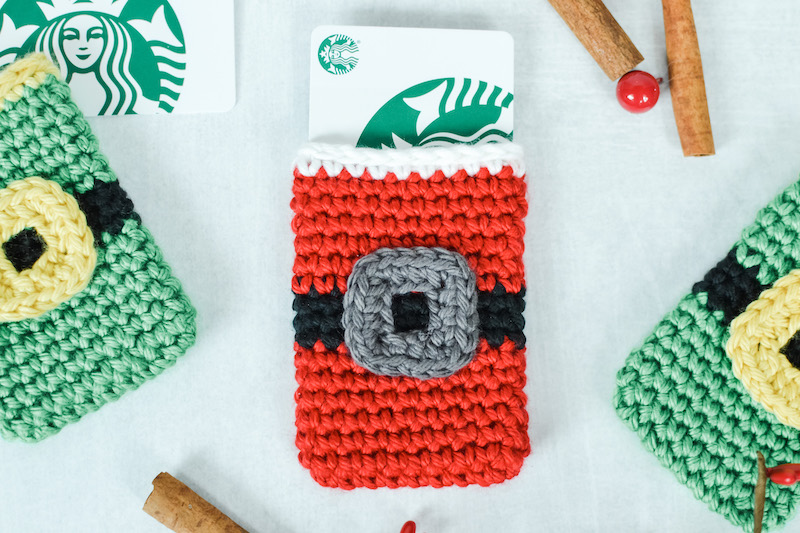
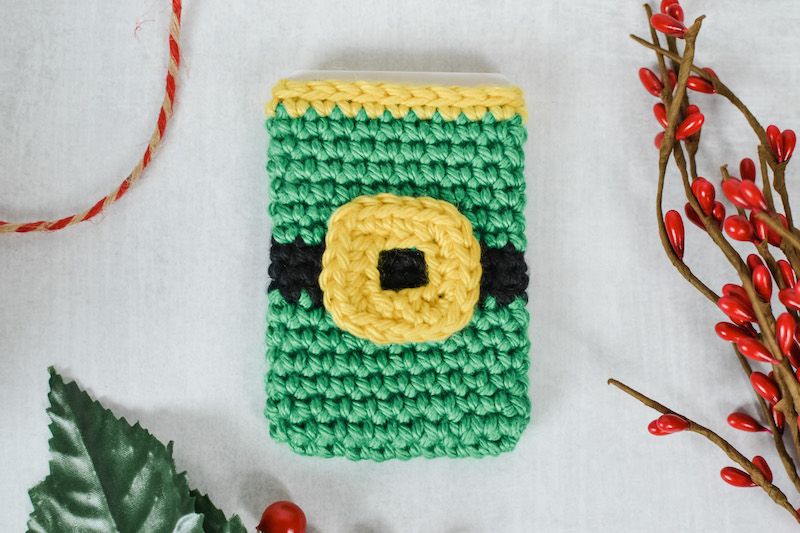
Jazz up that boring gift card with this festive and colorful Holiday Gift Card Holder. Choose between an Elf or Santa holder to delight your family.
Skill Level: Beginner
The pattern is written in U.S. crochet terms, complete with clear instructions, pictures, and a full video tutorial to help you along the way. Holiday Gift Card Holder is crocheted in continuous spirals without joining the rounds. I suggest using a stitch marker or different color yarn to keep track of each round. Holiday Gift Card Holder is crocheted in worsted weight yarn and is approximately 3.5 inches tall, 2.5 inches wide and fits standard gift cards. Be aware that size may vary depending on the yarn and hook size used.
Jump To The Free Pattern BelowFree Pattern
Video Tutorial
Need Help?
This pattern is free but it is still copyrighted
This crochet pattern, as well as all images and text contained herein are copyrighted by YarnSociety.com and should not be copied, emailed, sold, reproduced, or distributed in any way to any other person or entity, or posted on any website (links to this page are welcome). You may, however, sell the final product or products created from this crochet pattern in accordance with your state and local laws, with the exception of mass production.
Holiday Gift Card Holder Pattern Essentials
Supplies
- Worsted Weight Yarn
- Knit Picks Shine Worsted in Macaw (green) Serrano (red) (~15 yards)
- Knit Picks Shine Worsted in Black, Grey, Dandelion (yellow) and White (~3 yards)
- E/4 (3.50mm) crochet hook
- Yarn/Darning needle
- Tape Measurer
- Scissors
- Fabric glue
- Locking Stitch Markers (optional)
*These are affiliate links to supplies I personally use and love. Thank you for supporting Yarn Society.
Techniques
- Slip Knot
- Chain
- Single Crochet
- Single Crochet Increase
- Slip Stitch
- Seamless Join
Abbreviations
- ch – chain
- st/sts – stitch(es)
- R1:- round 1
- ( ) – repeat this group of stitches
- inc – increase (add 2 stitches into a stitch)
- sl st – slip stitch
- sc – single crochet
Holiday Gift Card Holder Pattern Example
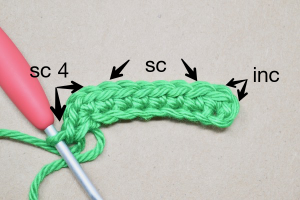
sc in next 20 sts {20 sts}
single crochet into each stitch -for a total of 20 stitches
inc in the second chain from hook, sc in next 6 sts, 4 sc in the last st (working down the other side of the chain) sc in next 6 sts, inc in the last st {20 sts}
two single crochet into the second chain from the hook, single crochet into each of the next 6 stitches, place 4 single crochet into the last stitch, (working down the other side) single crochet into each of the next 6 stitches, then place 2 single crochet into the last stitch – for a total of 20 stitches
FULL VIDEO TUTORIAL: https://youtu.be/29HDBitmYII
Holiday Gift Card Holder Full Pattern
GIFT CARD HOLDER
-
Using Color Green (elf) Red (santa)
Watch the step-by-step video tutorial on the gift card holder.
-
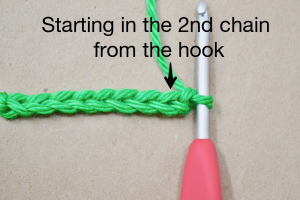
Make a slipknot and loosely chain 9
-
R1: inc in the second chain from hook, sc in next 6 sts, 4 sc in the last st
-
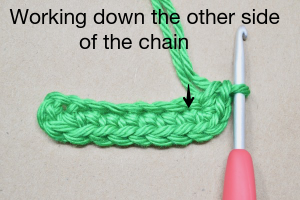
(working down the other side of the chain)
-
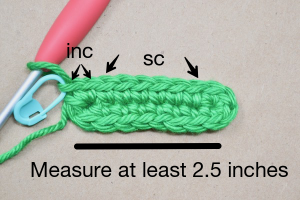
sc in next 6 sts, inc in the last st {20 sts}
-
The piece should measure about 2.5 inches long. If it measures smaller, re-make the piece with a size F hook. If it's a bit bigger, no need to re-make. The gift card does fit snug in the holder.
-
R2-7: sc in next 20 sts {20 sts}
-
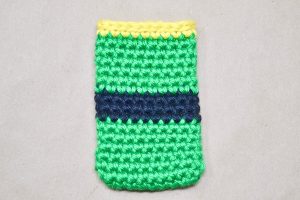
Change to color Black (elf and santa)
-
-
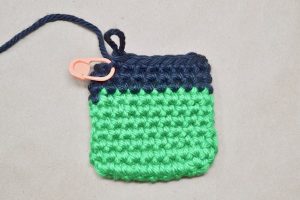
R8-10: sc in next 20 sts {20 sts}
-
Change to color Green (elf) Red (santa)
-
R11-16: sc in next 20 sts {20 sts}
-
Change to color Yellow (elf) White (santa)
-
R17: sc in next 20 sts {20 sts}
-
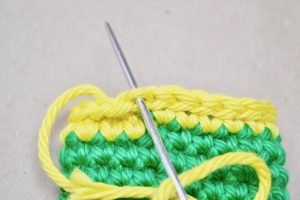
R18: sl st in the next 20 sts {20 sts}
-
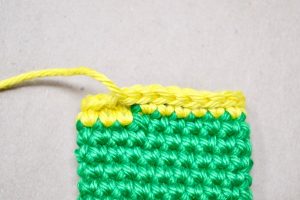
Sl st in the next 2 sts and then cut the working yarn, leaving a long tail.
-
Make a seamless join.
-
-
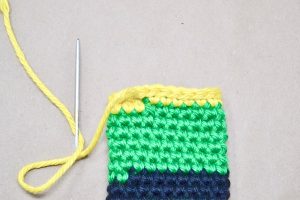
Pull the yarn through the last stitch instead of fastening off.
-
Thread the remaining yarn through a yarn needle and insert the needle under both loops of the stitch to the left of the last stitch - from outside to inside.
-
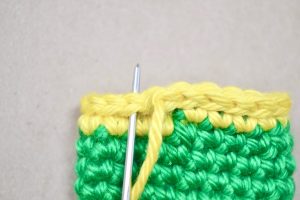
Then insert your needle through the middle of the V - of the last crocheted stitch to the right - from outside to inside.
-
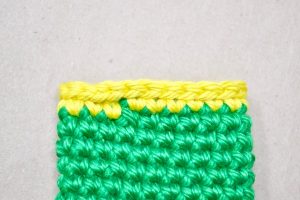
Weave in all ends.
-
Set aside until assembly.
-
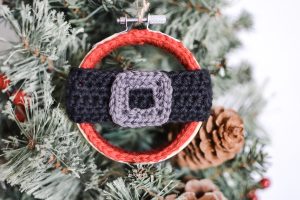
If you like Holiday Gift Card Holder, make sure to check out my Santa Belt Ornament Free Crochet Pattern.