-
Using color of choice
-
R1: 4 sc into a magic circle {4 sts}
-
R2: (sc, 3 sc) 2 times {8 sts}
-
R3: (sc, 3 sc) 4 times {16 sts}
-
R4: sc in next 2 sts, 3 sc, (sc in next 3 sts, 3 sc) 3 times, sc in last st {24 sts}
-
R5: sc blo in next 24 sts {24 sts}
-
R6-9: sc in next 24 sts {24 sts}
-
R10 we’re making the feet. I suggest using stitch markers to mark the back loops only of stitch 4, 6, 8, 10, 17, 19, 21 and 23. Each foot will be worked into the front loop only of the marked stitches. We will then work into the marked back loops in R11.
-
-
R10: sc in next 3 sts, [foot 1: sc flo then ch 7; starting in 2nd ch from hook make a small bobble, small bobble in next ch st, x-small bobble in next ch st, sl st in next 3 ch sts, sl st to original sc flo stitch to connect], sc in next st
-
[foot 2: sc flo then ch 6; starting in 2nd ch from hook make a small bobble, small bobble in next ch st, x-small bobble in next ch st, sl st in next 2 ch sts, sl st to original sc flo stitch to connect], sc in next st
-
[foot 3: sc flo then ch 5; starting in 2nd ch from hook make a small bobble, small bobble in next ch st, x-small bobble in next ch st, sl st in next ch st, sl st to original sc flo stitch to connect], sc in next st
-
[foot 4: sc flo then ch 4; starting in 2nd ch from hook make a small bobble, small bobble in next ch st, x-small bobble in next ch st, sl st to original sc flo stitch to connect], sc in next 6 sts
-
[foot 5: sc flo then ch 4; starting in 2nd ch from hook make a small bobble, small bobble in next ch st, x-small bobble in next ch st, sl st to original sc flo stitch to connect], sc in next st
-
[foot 6: sc flo then ch 5: starting in 2nd ch from hook make a small bobble, small bobble in next ch st, x-small bobble in next ch st, sl st in next ch st, sl st to original sc flo stitch to connect], sc in next st
-
[foot 7: sc flo then ch 6; starting in 2nd ch from hook make a small bobble, small bobble in next ch st, x-small bobble in next ch st, sl st in next 2 ch sts, sl st to original sc flo stitch to connect], sc in next st
-
[foot 8: sc flo then ch 7; starting in 2nd ch from hook make a small bobble, small bobble in next ch st, x-small bobble in next ch st, sl st in next 3 ch sts, sl st to original sc flo stitch to connect], sc in last st {24 sts}
-
-
R11: sc in next 3 sts, (sc in marked back loop, sc in next st) 3 times, sc in marked back loop, sc in next 6 sts, (sc in marked back loop, sc in next st) 4 times {24 sts}
-
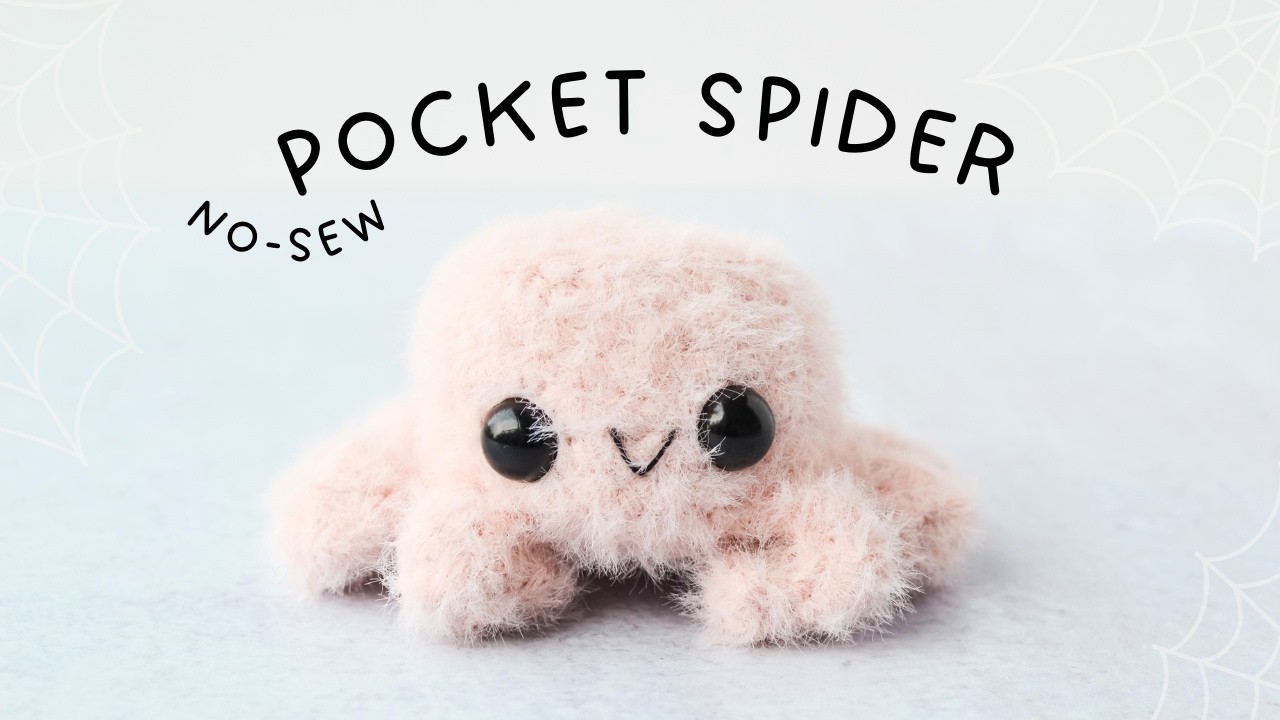
Pause here for the eyes and smile.
-
For worsted weight yarn: 9mm eyes
-
For bulky yarn: 12mm eyes
-
Place safety eyes between R8 and R9 leaving 4 stitches open. Feel free to place them a round higher if your prefer. Embroider a smile over 2 stitches, between the eyes, at R8/R9 and R9/R10. Feel free to add pink cheek stitches under the eyes.
-
Optional: Position the bow where you’d like it on the spider - using the yarn tails, weave each tail through a stitch. Secure the bow with a knot on the inside of the head.
-
R12: (dec, sc in next 2 sts) 6 times {18 sts}
-
Begin to stuff the head and continue as you crochet. Make sure not to overstuff. You want the top and bottom to lay flat.
-
-
R13: (dec, sc) 6 times {12 sts}
-
R14: (dec) 6 times {6 sts}
-
Fasten off and leave a long piece of yarn to sew the head shut.
-

Weave in any remaining yarn tails.
-

Worsted weight spider
-

Chenille bulky spider
-

Fuzzy spider
-

Enjoy your adorable new friend!
-
-

If you like Pocket Spider, make sure to check out my Pocket Fox Free Crochet Pattern.