Herringbone Pumpkins
Free Amigurumi Crochet Pattern
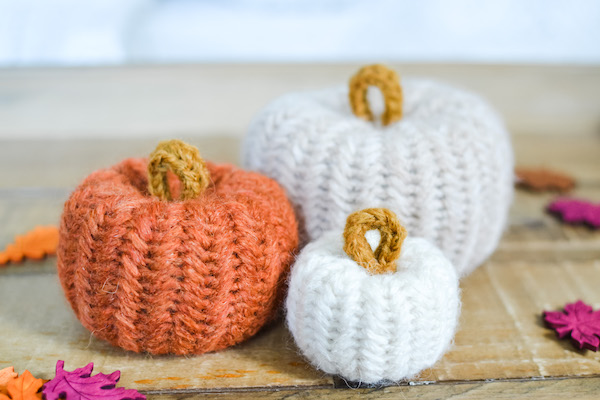
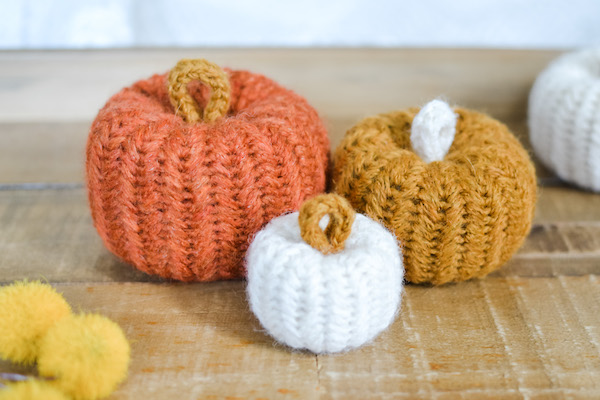
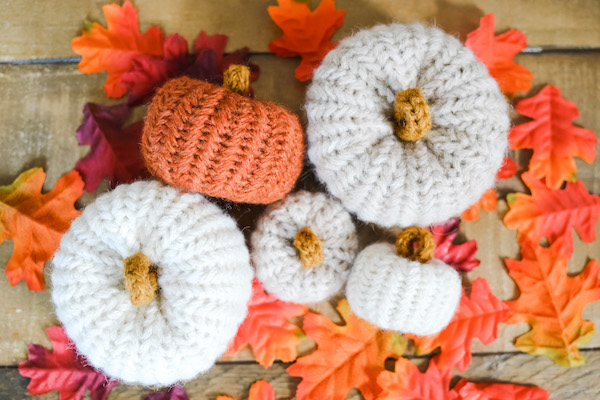
Herringbone Pumpkins are an easy way to add a trendy look to your fall home decor. A flat panel of herringbone stitches are transformed into a cute pumpkin decoration.
Skill Level: Advanced Beginner
The pattern is written in U.S. crochet terms, complete with clear instructions, pictures, and video tutorial. Herringbone Pumpkins and stems are worked in rows with the herringbone single crochet stitch – no increasing or decreasing needed. Herringbone Pumpkins are crocheted in worsted weight yarn, size may vary depending on the yarn and hook size used.
Jump To The Free Pattern BelowFree Pattern
Video Tutorial
Need Help?
This pattern is free but it is still copyrighted
This crochet pattern, as well as all images and text contained herein are copyrighted by YarnSociety.com and should not be copied, emailed, sold, reproduced, or distributed in any way to any other person or entity, or posted on any website (links to this page are welcome). You may, however, sell the final product or products created from this crochet pattern in accordance with your state and local laws, with the exception of mass production.
Herringbone Pumpkins Pattern Essentials
Supplies
- Worsted Weight Yarn
- Lion Brand Chainette in Cream, Beige, Mustard, Amber
- Small (~19 yards) Medium (~39 yards) Large (~66 yards)
- D (3.25mm) crochet hook (small stem)
- E/4 (3.50mm) crochet hook (small pumpkin)
- G (4.0mm) crochet hook (medium stem)
- 7 (4.5mm) crochet hook (medium pumpkin and large stem)
- H (5.00mm) crochet hook (large pumpkin)
- Polyfil or stuffing of your choice
- Yarn/Darning needle
- Scissors
- Locking Stitch Markers (optional)
*These are affiliate links to supplies I personally use and love. Thank you for supporting Yarn Society.
Techniques
- Slip Knot
- Chain Stitches
- Single Crochet
- Herringbone Single Crochet
- Whip Stitch
Abbreviations
ch – chain
hsc- herringbone single crochet
sc – single crochet
st/sts – stitch(es)
R1:- row 1
[RS] – right side
[WS] – wrong side
Herringbone Pumpkins Pattern Example
Herringbone Single Crochet Stitch: Insert hook into previous stitch’s ‘vertical bar’ and then into the next stitch, yarn over and pull through, yarn over and pull through all 3 loops on hook. Step-by-step pictures included.
Chain stitch in the beginning of the row does not count as the first stitch.
Repeat R2 and R3 throughout the pattern.
There is a right side [RS] and a wrong side [WS] of the herringbone single crochet. The right side has the herringbone design and the wrong side has ridges.
Gauge (Using a 7/4.5 hook)
22 stitches = 4 inches
14 rows = 4 inches
Small Pumpkin: ~3.5 inches tall
Medium Pumpkin: ~5.5 inches tall
Large Pumpkin: ~7 inches tall
Crochet Along Herringbone Pumpkin Video
Original Stitch Tutorial by For The Frills
Herringbone Pumpkins Full Pattern
- herringbone single crochet
- small pumpkin
- medium pumpkin
- large pumpkin
- close pumpkin
- stems and assembly
HERRINGBONE SINGLE CROCHET
-
Note: when the pattern states, right side [RS], place your hook from front to back.
-
When the pattern states, wrong side [WS], place your hook from back to front.
-
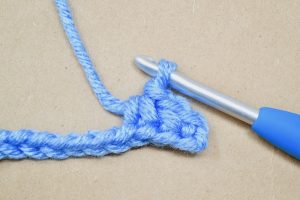
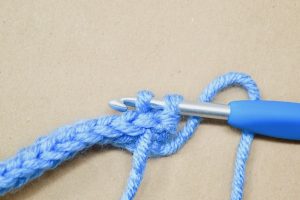
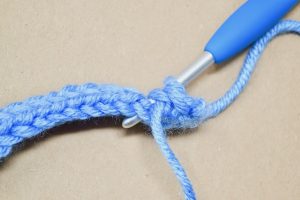
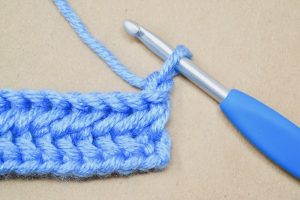
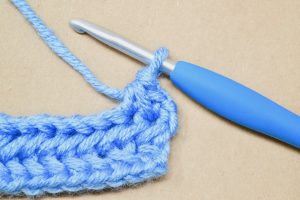
R1: [RS] Working into the back bumps of the chain, sc into the 2nd chain from the hook, hsc across the row, turn.
Step-by-step pictures below.
-
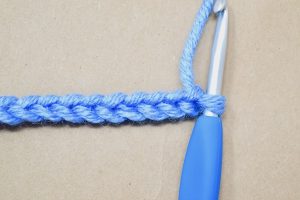
Make a slip knot and chain desired amount of stitches
I chained 15 for this example swatch.
-
Working into the back bumps only
-
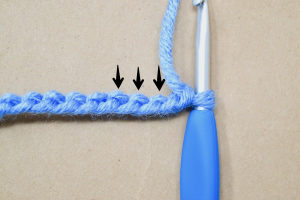
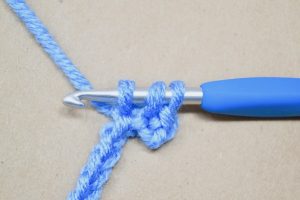
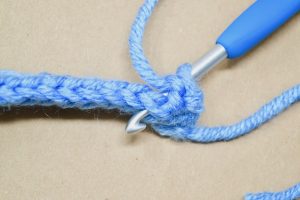
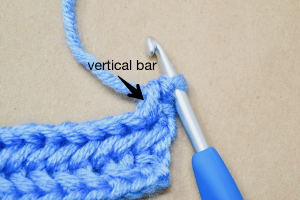
sc into the 2nd chain 'back bump' from the hook
Notice the previous stitch's vertical bar.
-
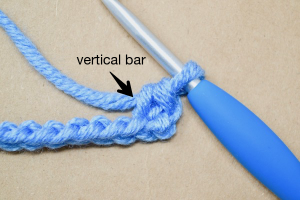
Insert hook under the 'vertical bar' of the previous stitch
-
-
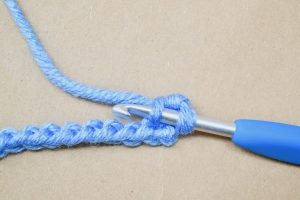
Then into the next back bump
-
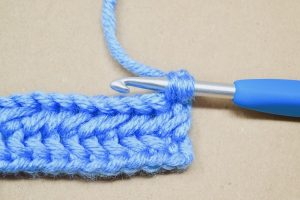
Yarn over and pull up a loop (pull the loop to the height of the previous stitch)
-
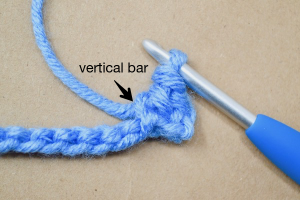
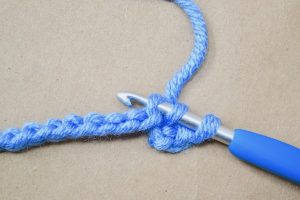
Yarn over and pull through all three loops on the hook (first hsc complete)
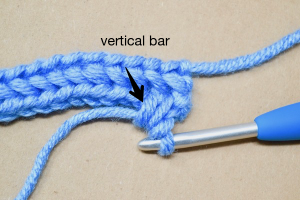
Notice the previous stitch's vertical bar.
-
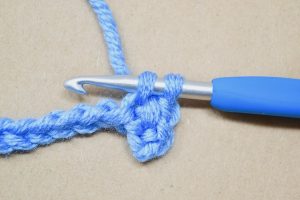
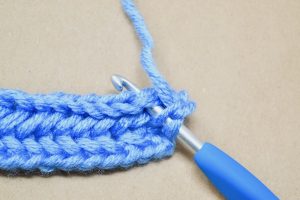
For the next hsc, insert hook under the 'vertical bar' of the previous stitch
-
Then into the next back bump
-

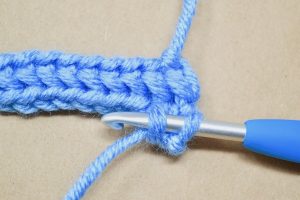
Yarn over and pull up a loop (pull the loop to the height of the previous stitch)
-
Yarn over and pull through all three loops on the hook
-
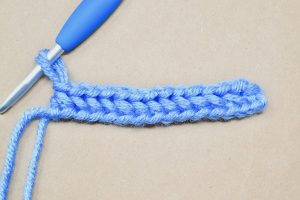
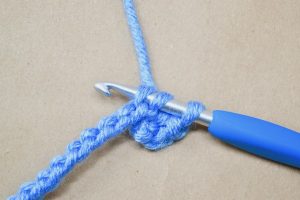
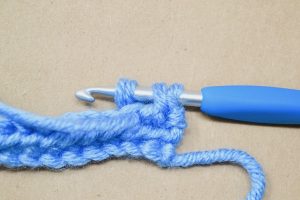
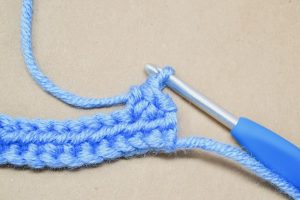
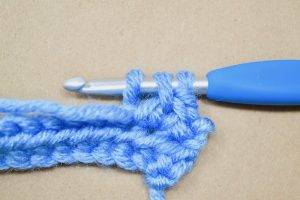
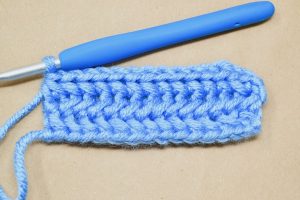
Continue hsc across the row
This is considered the right side of the stitch - shows the herringbone design.
-
-
Turn your work
-
R2: [WS] Chain 1, (working from back to front) sc into the first stitch, hsc across the row, turn.
Step-by-step pictures below.
-
Chain 1
-
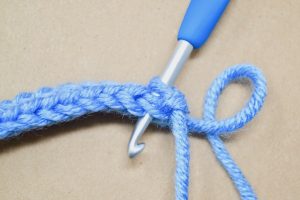
Insert your hook into the first stitch from back to front
Move your working yarn to the front.
-
Yarn over and pull up a loop (pull the loop to the height of the previous stitch)
This part feels a bit odd, as you pull the yarn through, the crochet hook will turn. Please watch the video tutorial if you need more help.
-
Yarn over and pull through two loops on the hook, completing a single crochet
-
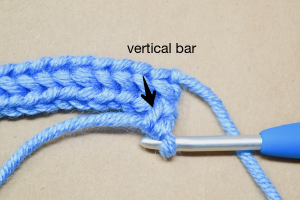
Rotate the swatch so the top of the "V's" are facing you and the wrong side is facing up.
Notice the previous stitch's vertical bar.
-
Insert hook under the 'vertical bar' of the previous stitch
-
-
Then into the next stitch from back to front
-
Yarn over and pull up a loop (pull the loop to the height of the previous stitch)
The hook will turn as you pull the yarn through.
-
Yarn over and pull through all three loops on the hook (first hsc complete)
-
For the next hsc, rotate the swatch again.
Notice the previous stitch's vertical bar.
-
Insert hook under the 'vertical bar' of the previous stitch
-
Then into the next stitch from back to front
-
Yarn over and pull up a loop (pull the loop to the height of the previous stitch)
The hook will turn as you pull the yarn through.
-
Yarn over and pull through all three loops on the hook
-
-
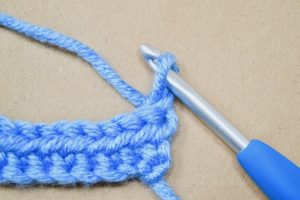
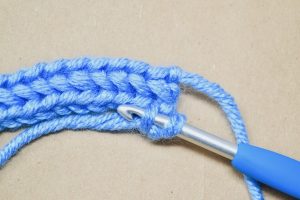
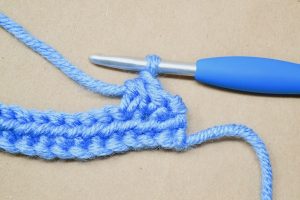
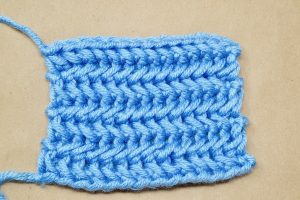
Continue hsc across the row.
This is considered the wrong side of the stitch - it has ridges
-
Turn your work
-
R3: [RS] Chain 1, sc into the first stitch, hsc across the row, turn.
Step-by-step pictures below.
-
Chain 1
-
Single crochet into the first stitch.
Notice the previous stitch's vertical bar.
-
Insert hook under the 'vertical bar' of the previous stitch
-
Then into the next stitch
-
Yarn over and pull up a loop (pull the loop to the height of the previous stitch)
-
-
Yarn over and pull through all three loops on the hook (first hsc complete)
-
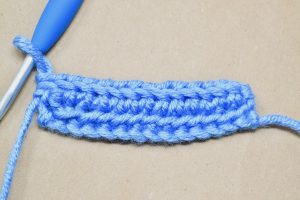
Continue hsc across the row
This is considered the right side of the stitch - shows the herringbone design.
-
Turn your work
-
Continue by repeating R2 and R3 until you get to the desired length.
-
Right Side
The side with the herringbone design.
-
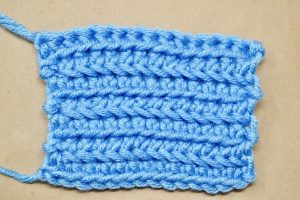
Wrong side
The side with the ridges.
-

If you like Herringbone Pumpkins, make sure to check out my Faux Knit Pumpkins Free Crochet Pattern.