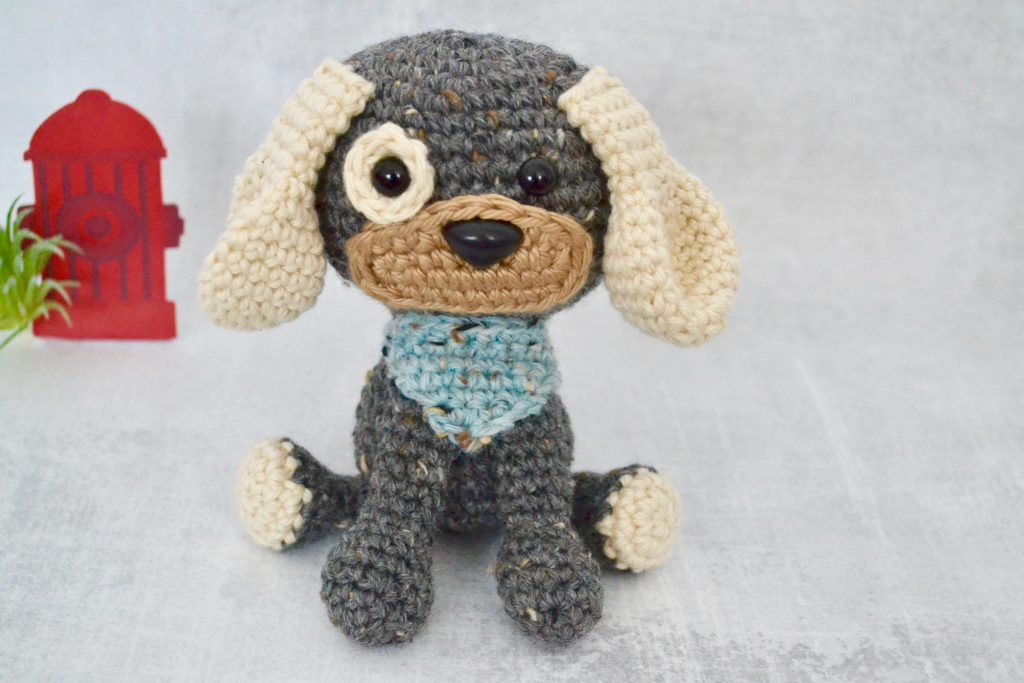
Dash The Dog
Free Amigurumi Crochet Pattern
Dash The Dog amigurumi pattern is the perfect crochet pattern for puppy lovers.
Skill Level: Easy
The pattern is written in U.S. crochet terms, complete with clear instructions and pictures to help you along the way. Dash The Dog is crocheted in continuous spirals without joining the rounds. I suggest using a stitch marker or different color yarn to keep track of each round. Dash The Dog crocheted in worsted weight yarn is approximately five inches tall. Be aware that size may vary depending on the yarn and hook size used. Gauge is not particularly important, just be consistent with the tension you are using. And most importantly, have fun!
Jump To The Free Pattern BelowFree Pattern
Birthday
July 13, 2019
Likes
Chasing Balls and Visiting Pet Stores
Dislikes
Squirrels, Small Spaces and Rain
Need Help?
This pattern is free but it is still copyrighted
This crochet pattern, as well as all images and text contained herein are copyrighted by YarnSociety.com and should not be copied, emailed, sold, reproduced, or distributed in any way to any other person or entity, or posted on any website (links to this page are welcome). You may, however, sell the final product or products created from this crochet pattern in accordance with your state and local laws, with the exception of mass production.
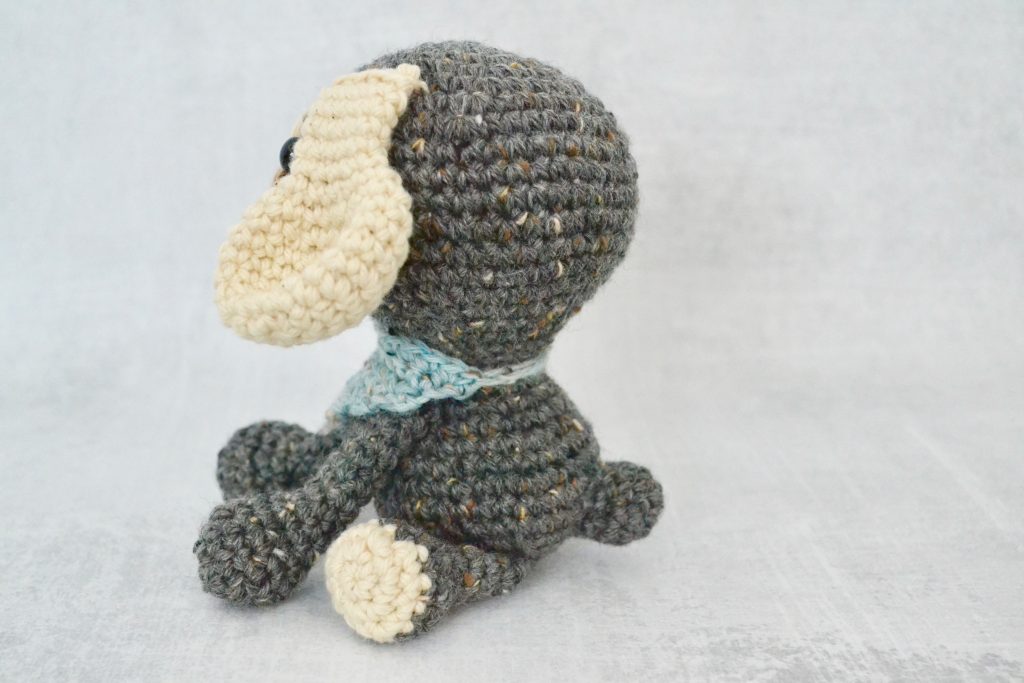
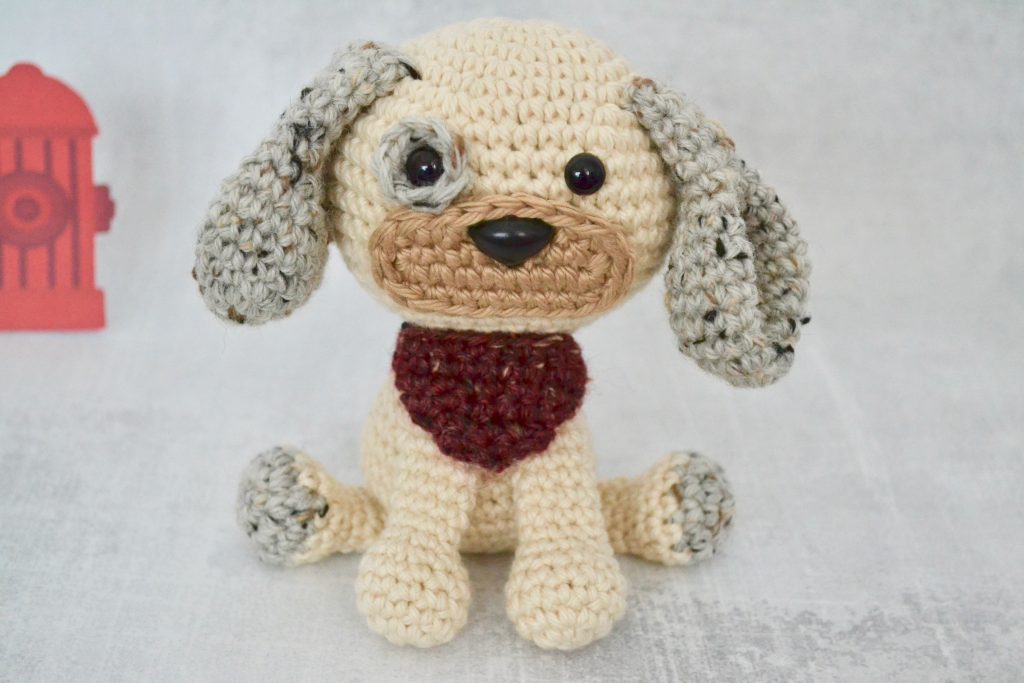
Dash The Dog Pattern Essentials
Supplies
- Worsted-Weight Yarn
-
Knit Picks Wool of the Andes tweed yarn in Flagstone Heather (grey) (~71 yards)
-
Knit Picks Comfy Worsted in Ivory (~26 yards)
-
Knit Picks Shine Worsted in Willow (brown) (~9 yards)
-
Knit Picks Wool of the Andes tweed yarn in North Pole Heather (blue) (~<1 yard)
-
- E/4 (3.50mm) crochet hook
- Two 9mm safety eyes (Not recommended for children under 3 years old)
- 18mm plastic safety nose
- Polyfil or stuffing of your choice
- Yarn/Darning needle
- Scissors
- Locking Stitch Markers (optional)
*These are affiliate links to supplies I personally use and love. Thank you for supporting Yarn Society.
Techniques
- Magic Circle
- Single Crochet
- Single Crochet Increase
- Single Crochet Decrease (I like to use an invisible decrease)
- Half Double Crochet
- Double Crochet
- Fastening Off
- Attaching Parts
- Changing Colors
Abbreviations
- sc – single crochet
- st/sts – stitch(es)
- inc – increase (add 2 single crochet into a stitch)
- dec – decrease (join 2 single crochet into 1)
- hdc – half double crochet
- dc – double crochet
- R1- round 1
- ( ) – repeat this group of stitches
Dash The Dog Pattern Example
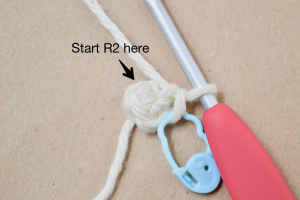
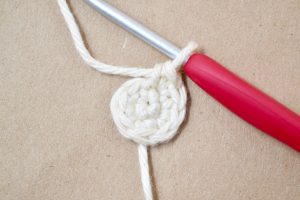
6 sc into a Magic Circle {6 sts}
R1 starts with 6 single crochet in a magic circle
Alternate way to begin: chain 2, sc 6 times in 2nd chain from hook
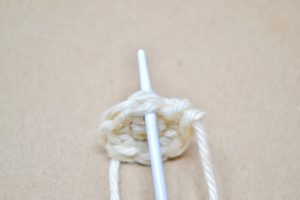
(inc) 6 times {12 sts}
(2 single crochets in each stitch) – repeat the sequence a total of 6 times for a total of 12 sts
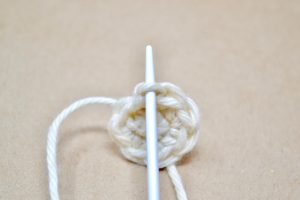
(inc, sc in next st) 6 times {18 sts}
(2 single crochets in one stitch, then single crochet in the next stitch) – repeat that sequence a total of 6 times for a total of 18 sts
(dec, sc in next 2 sts) 6 times {18 sts}
(join 2 single crochets into 1, and then single crochet in next 2 stitches) – repeat that sequence a total of 6 times for a total of 18 sts
Easiest Magic Circle Ever: https://youtu.be/yflbIzbEnuk
Tutorial on How To Close An Amigurumi Piece: https://yarnsociety.com/tutorials/how-to-close-an-amigurumi-piece
How to Do a Seamless Join: https://yarnsociety.com/tutorials/how-to-do-a-seamless-join-on-an-open-piece/
Dash The Dog Full Pattern
EYE PATCH
-
Using Color Beige
-
R1: 4 sc into a magic circle (4 sts)
Don't pull the middle tight. The safety eye will be placed in the middle.
-
Alternate way to begin: chain 2, sc 4 times in 2nd chain from hook {4 sts}
-
R2: (inc) 4 times {8 sts}
-
For A Seamless Join On An Open Piece:
-
Cut the working yarn, leaving a small tail. Pull the yarn through the last stitch.
-
Thread the remaining yarn through an embroidery needle. Insert the needle under both loops of the stitch to the left of the last stitch - from outside to inside.
-
Then insert your needle through the middle of the V - of the last crocheted stitch - from outside to inside.
-
-
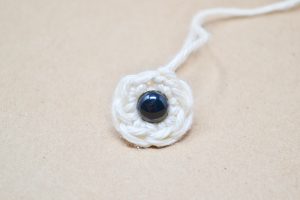
Insert a 9mm safety eye through the middle of the eye patch. Do not attach the back of the safety eye. Weave in all ends. Set aside until assembly.
-

If you like Dash The Dog, make sure to check out my Sharlotte The Spider Free Crochet Pattern.